Silhouette Stencil
Learn how to create your own silhouette Clipart and use it to create a custom stencil for your images.
 | Step 1
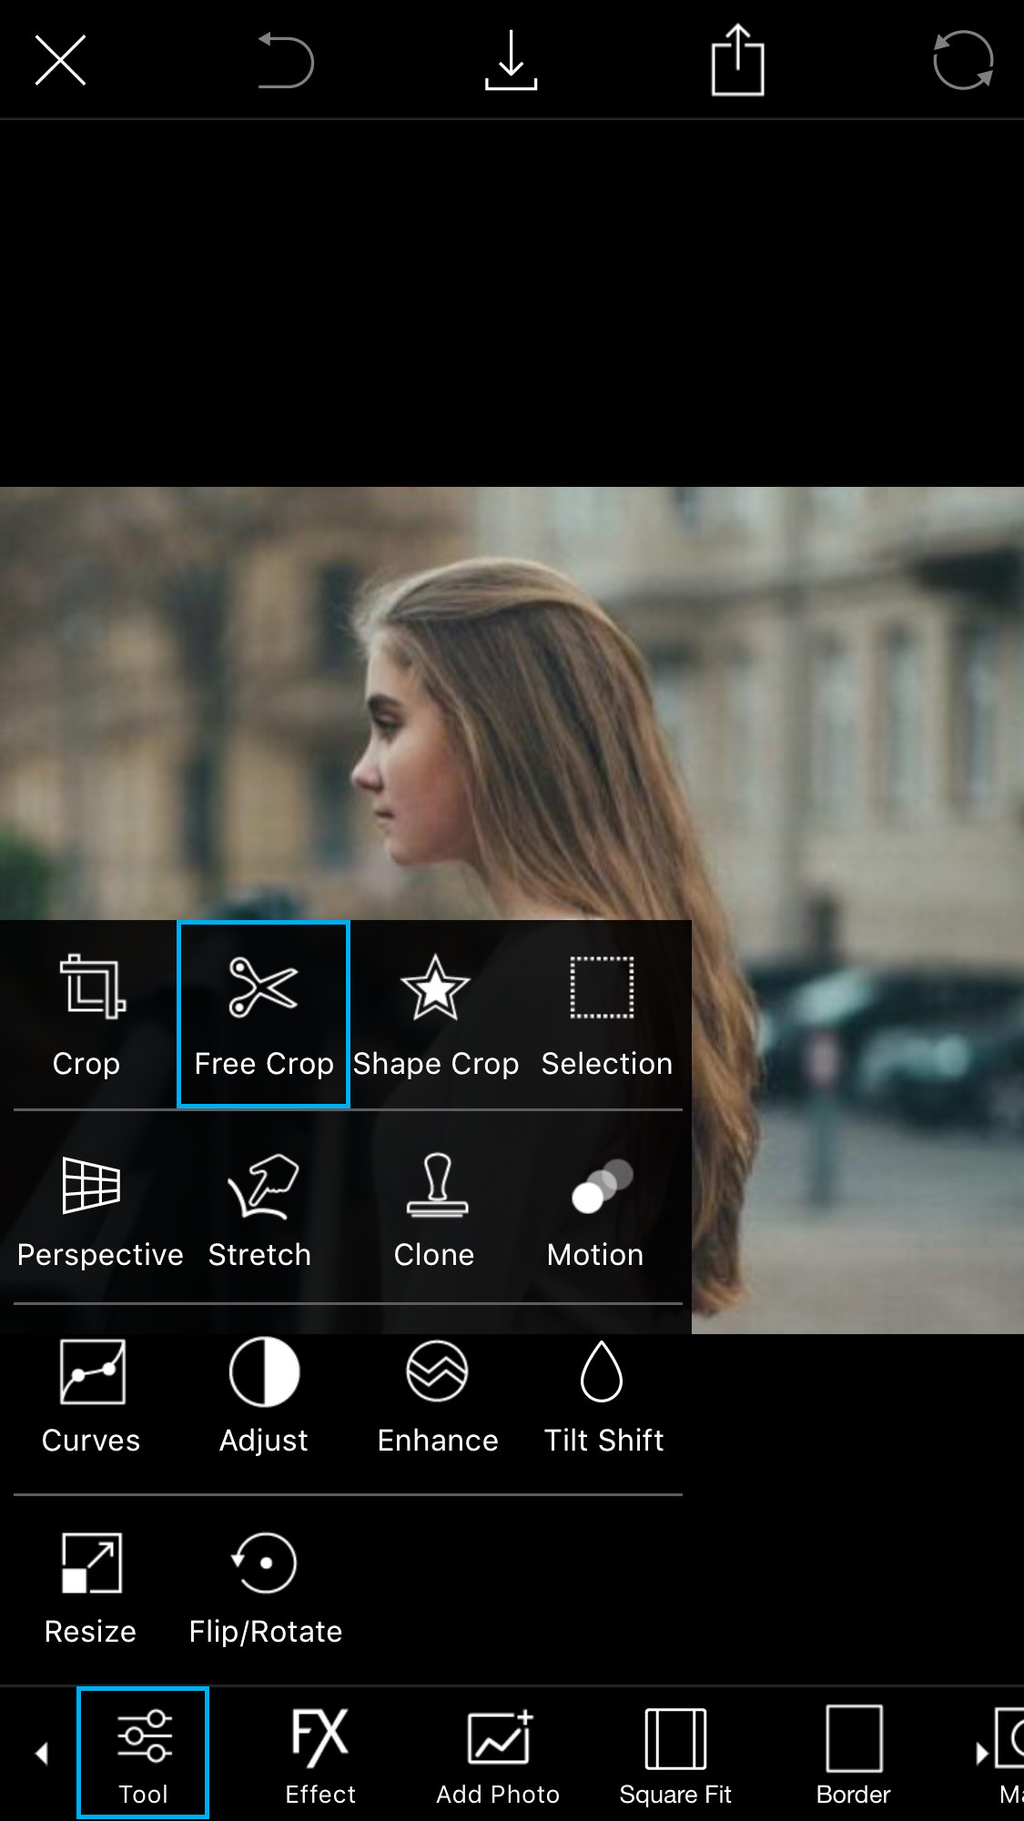
Open a portrait taken in profile in the photo editor. Use your own shot or find one by searching for #FreeToEdit and #Portrait in the app. Tap on Tool and select the Free Crop Tool.
|
 | Step 2
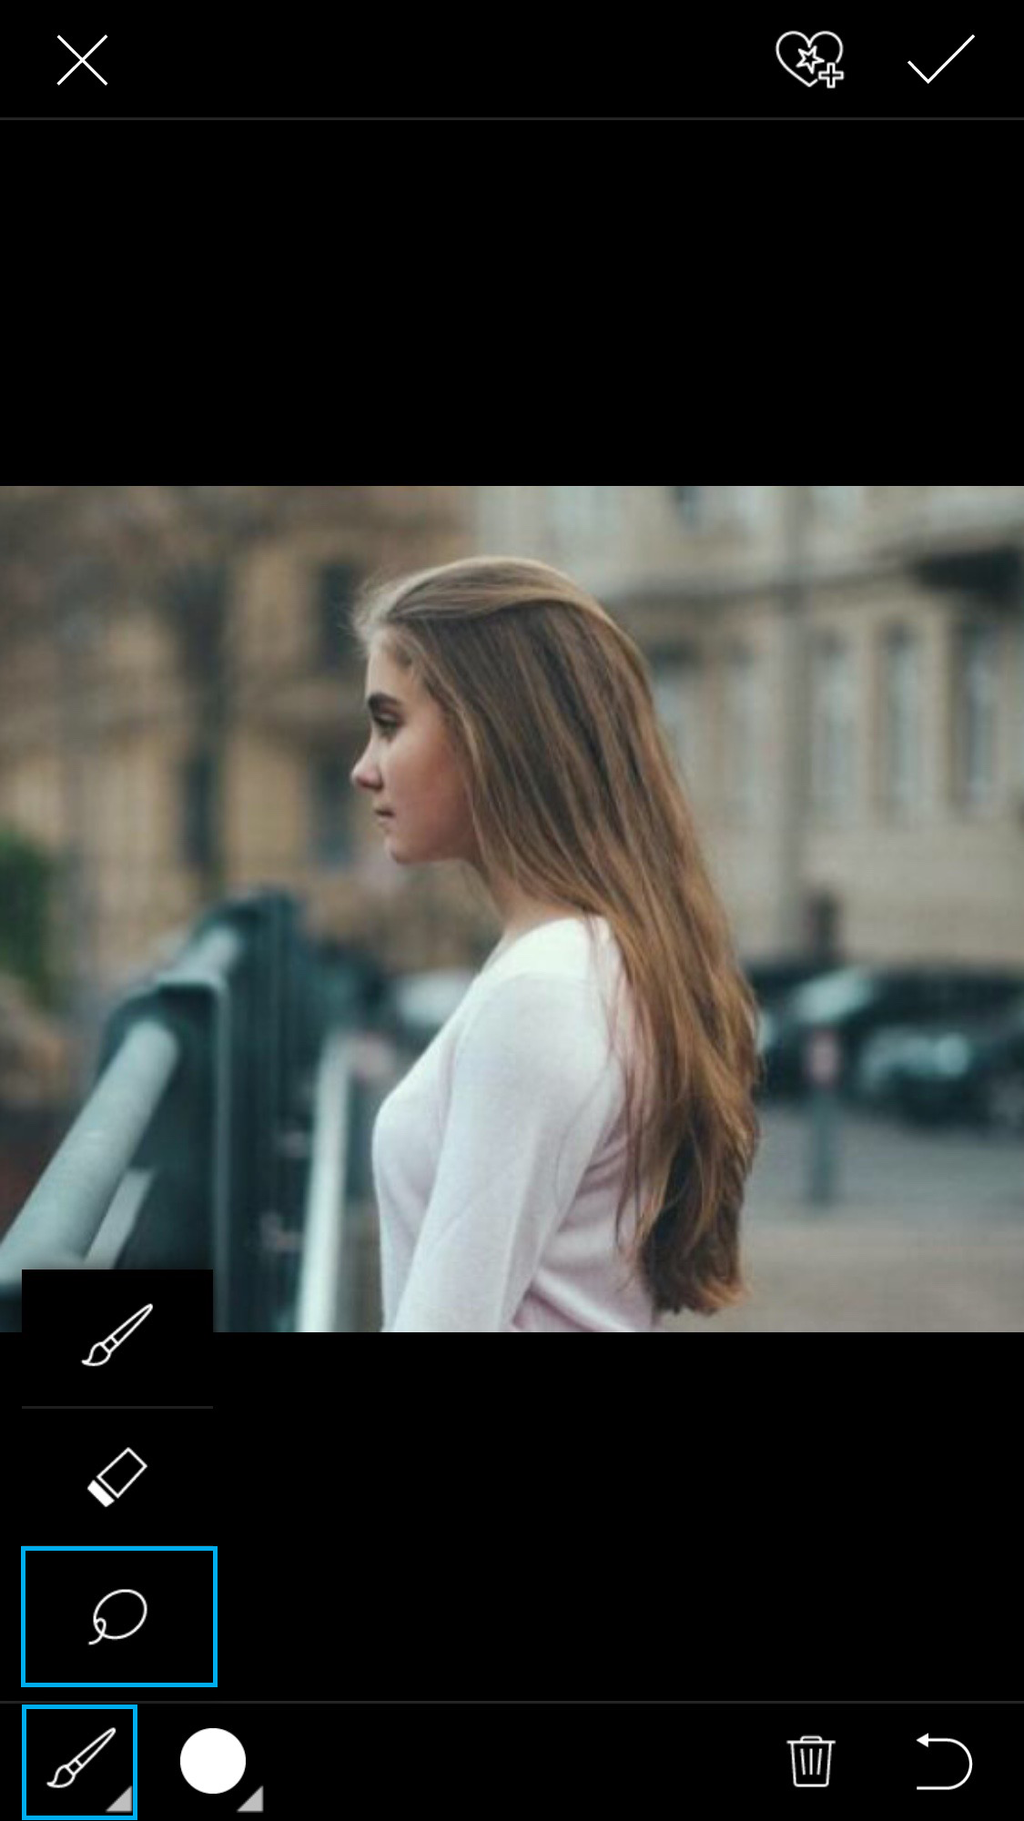
Tap on the paintbrush icon and select the Lasso Tool.
|
 | Step 3
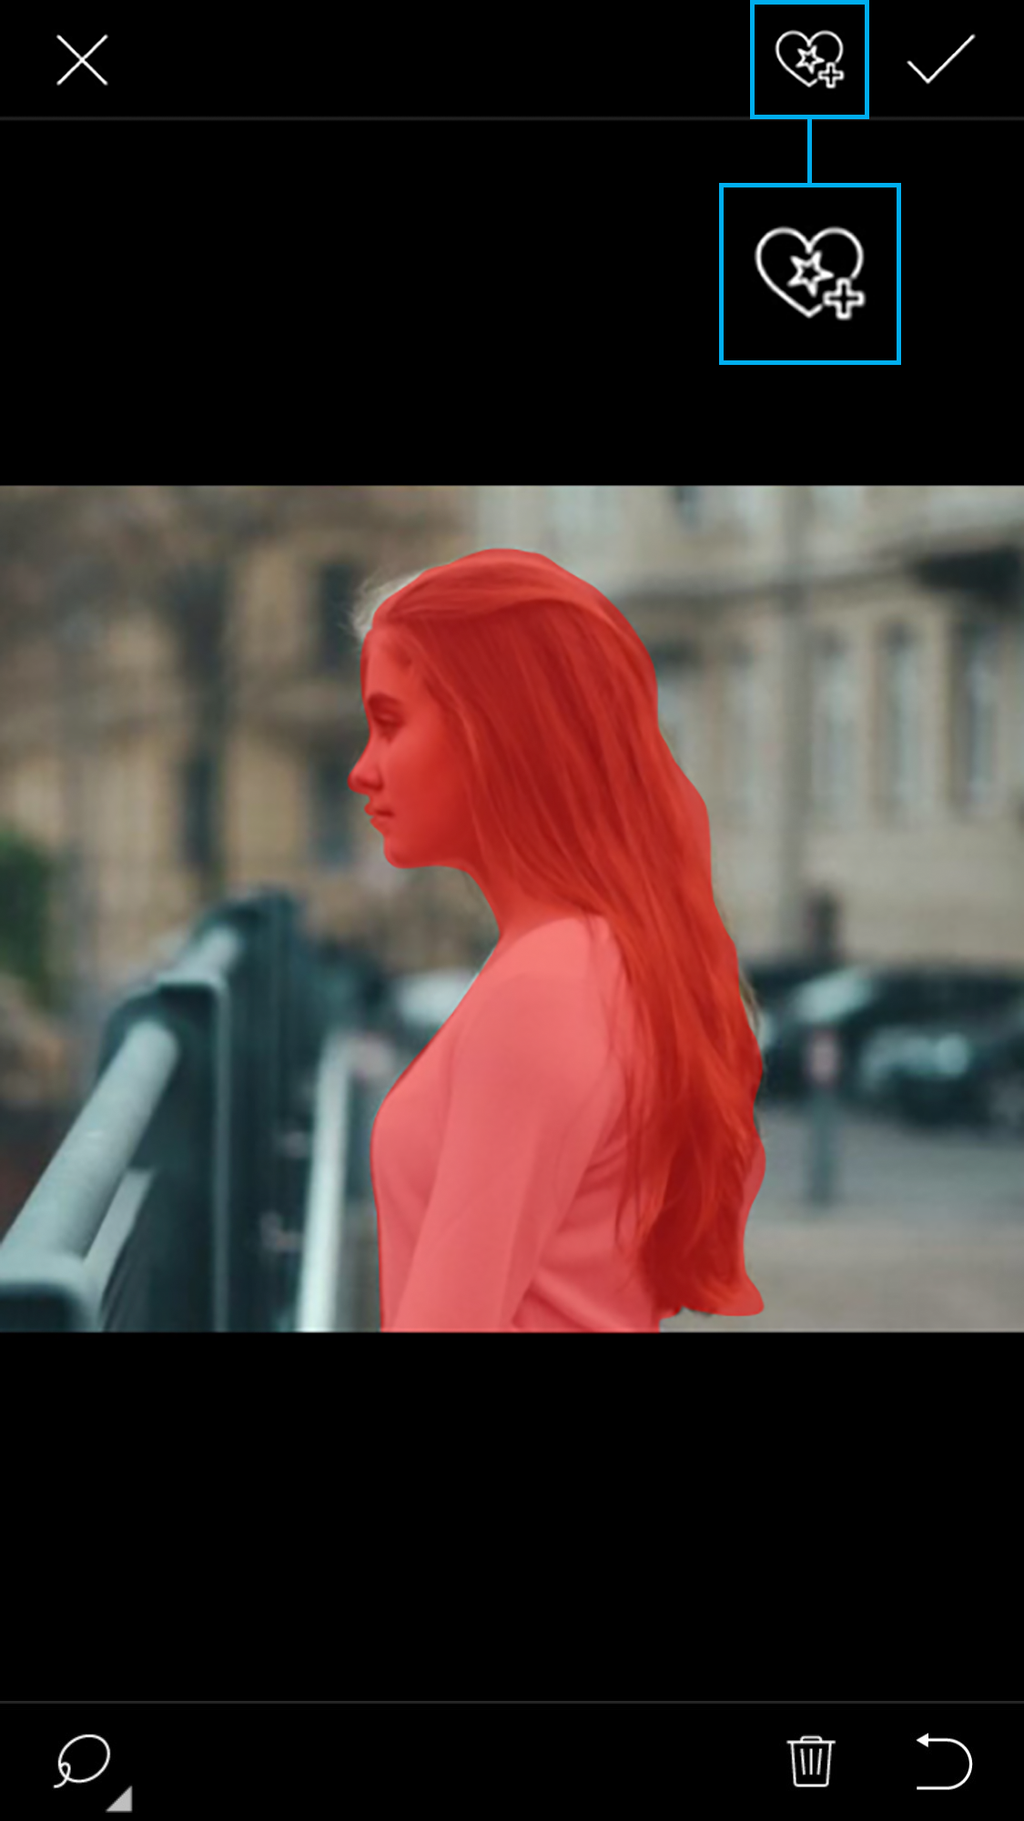
Run your finger or stylus along the outline of your subject to select it. You can always refine your outline by switching to the Eraser Tool to un-select portions of your subject. Tap on the heart icon to save your selection as Clipart.
|
 | Step 4
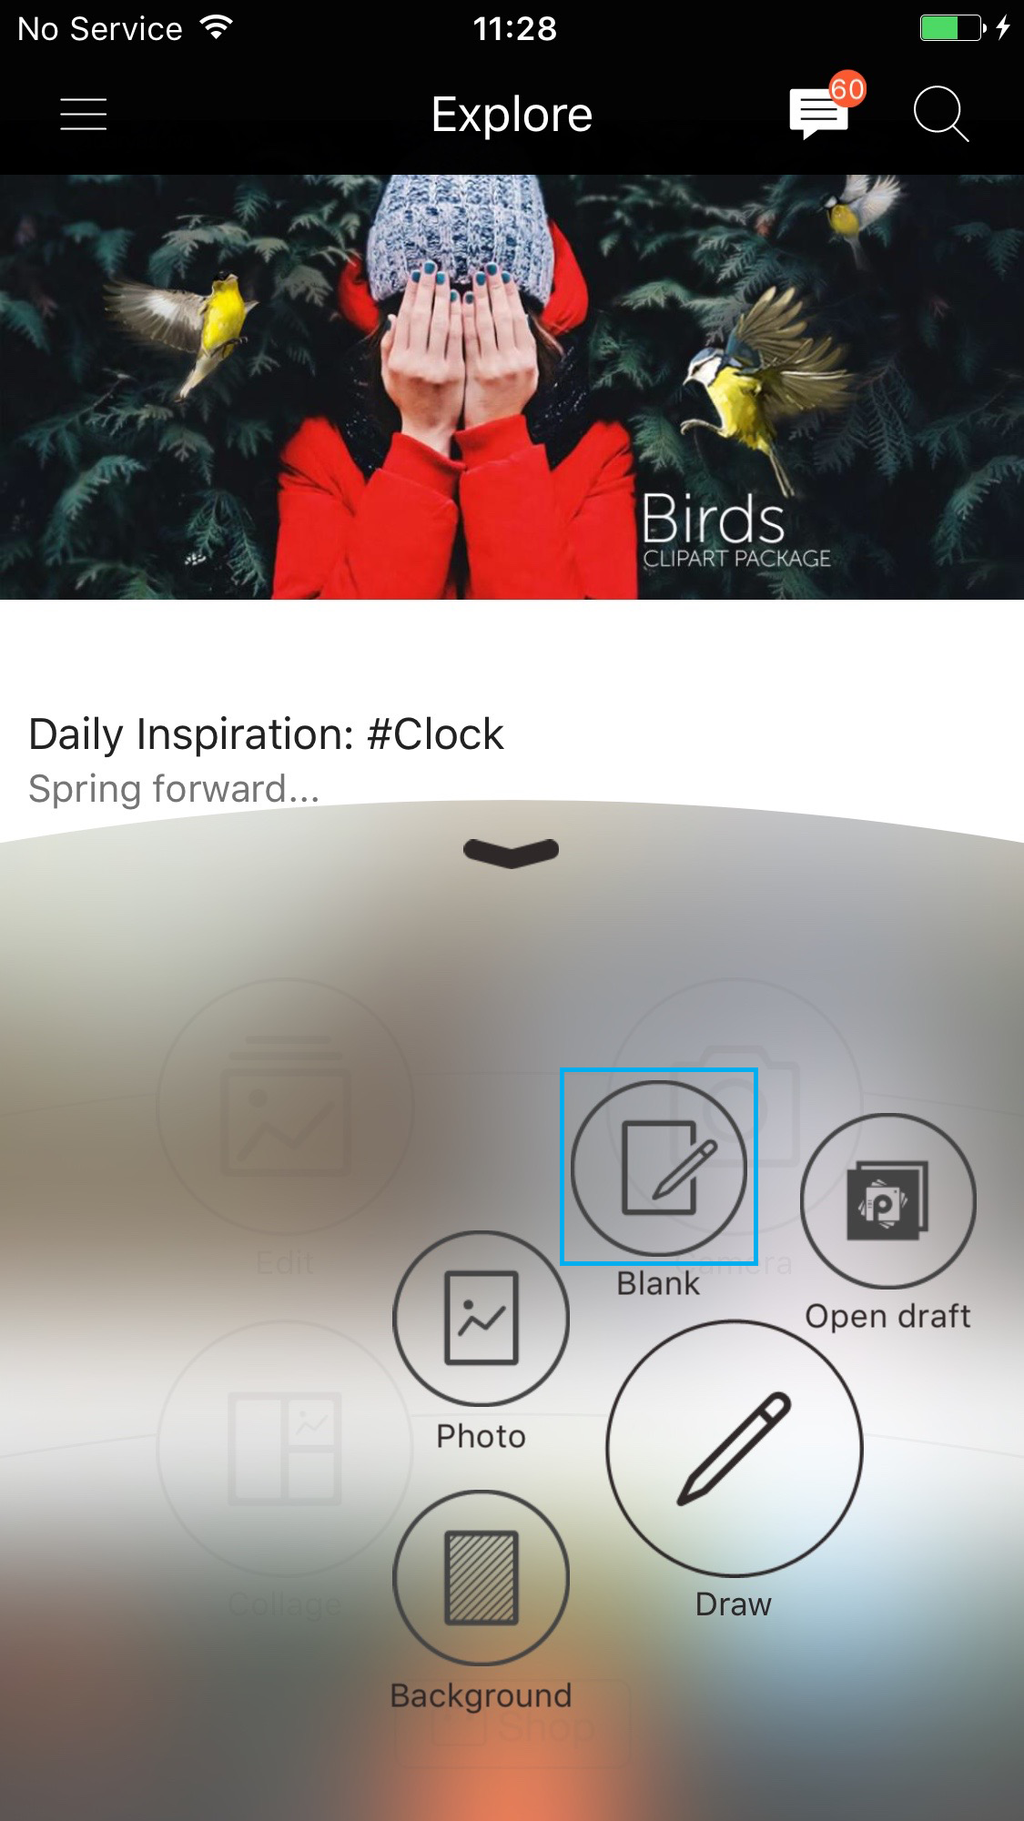
Close the photo editor and open a blank canvas in Draw.
|
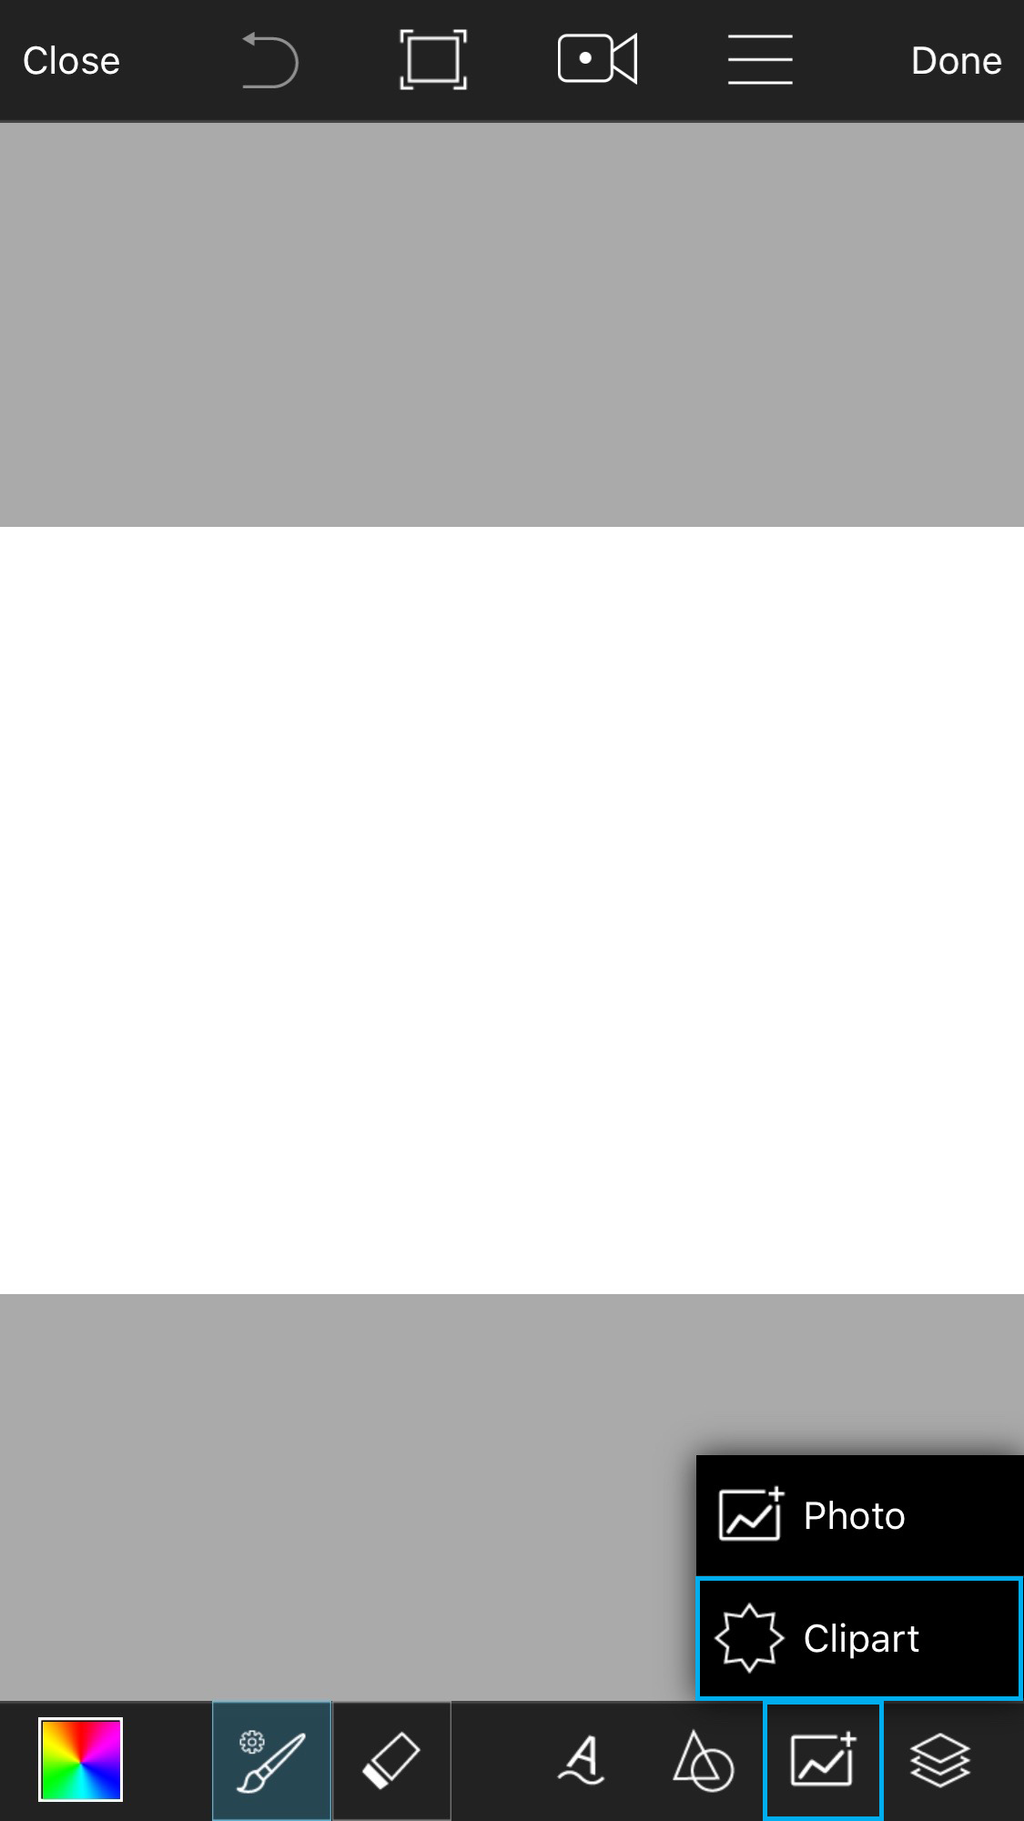 | Step 5
Tap on the Add icon and select Clipart.
|
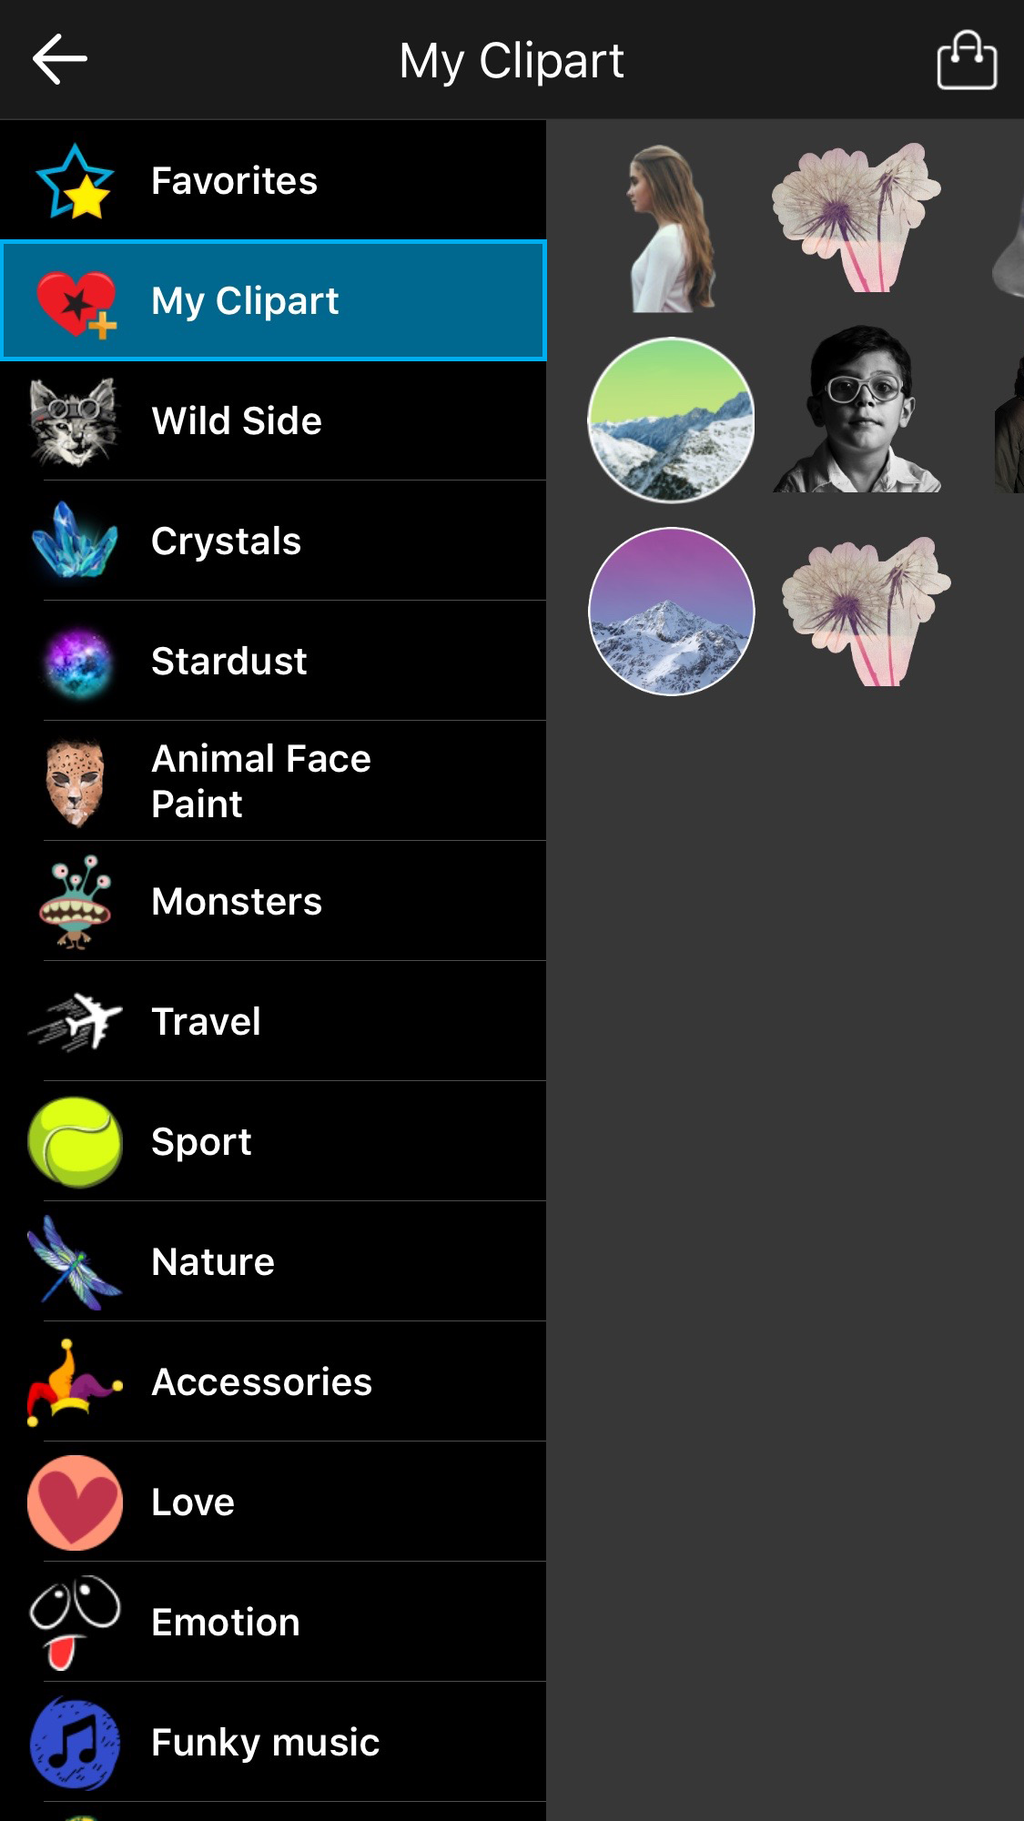 | Step 6
Tap on My Clipart to view your custom Clipart images.
|
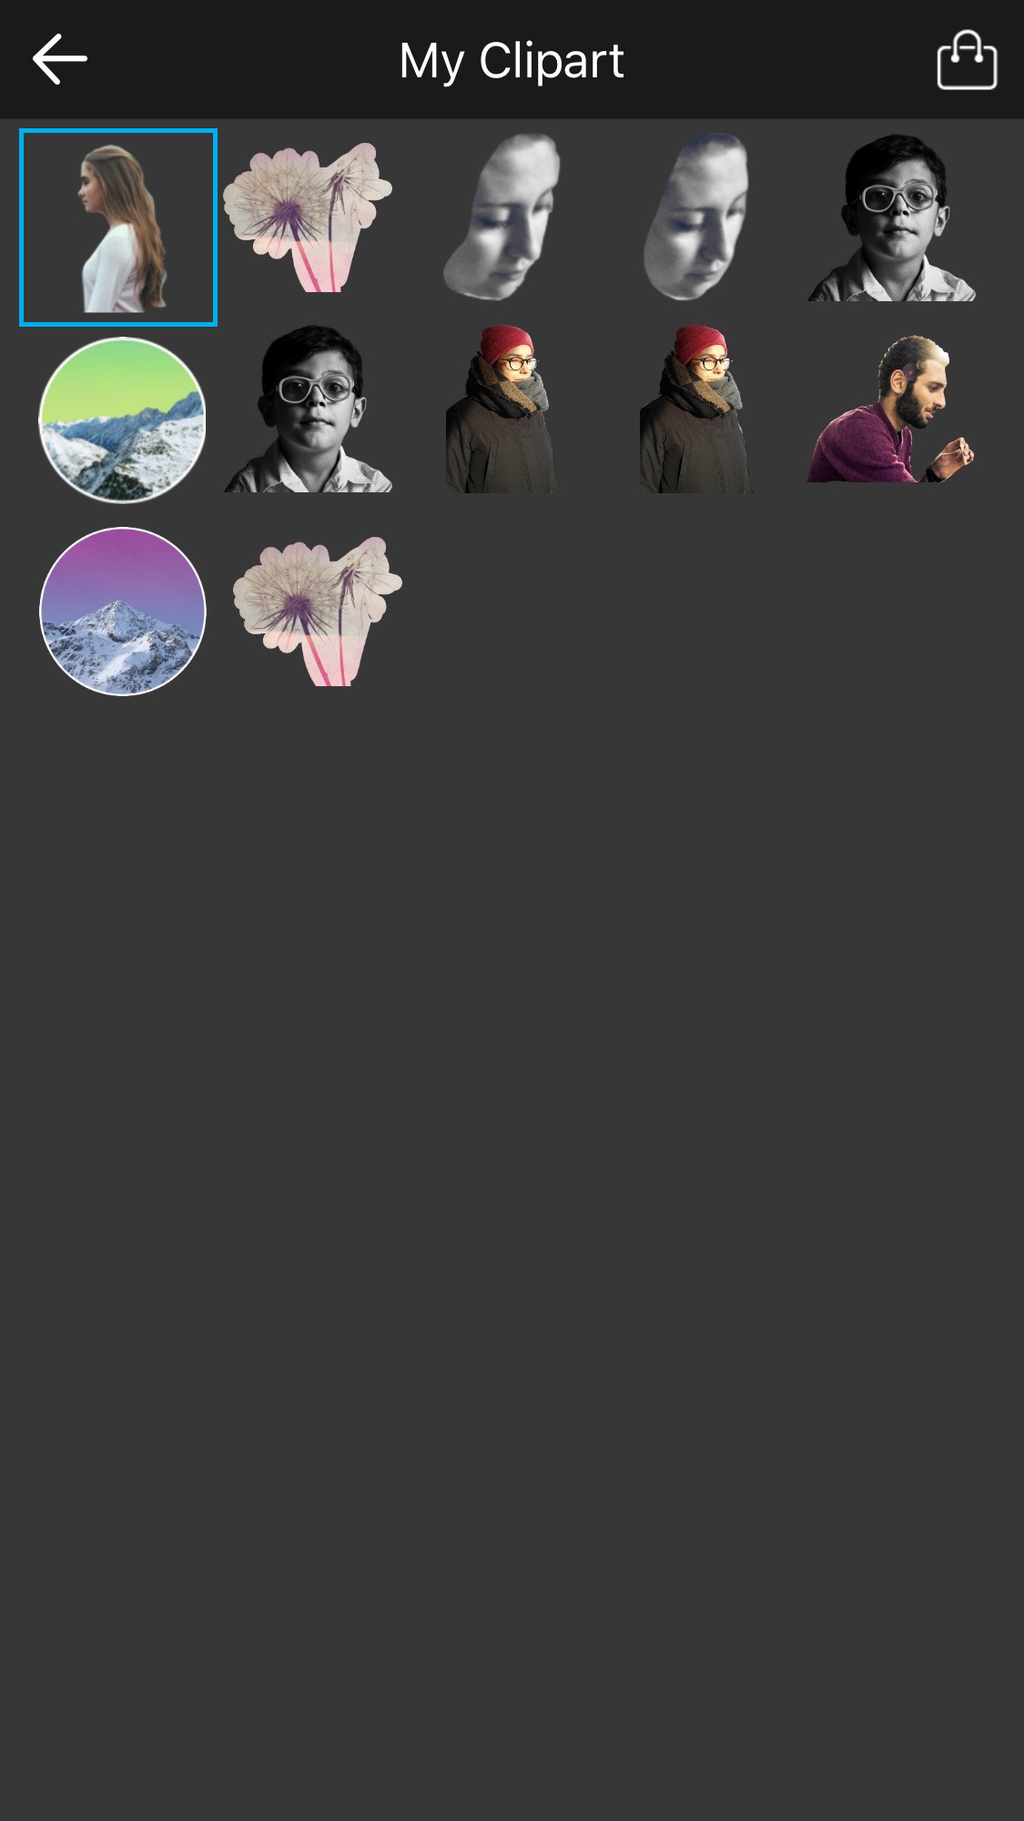 | Step 7
Select the Clipart image you just created.
|
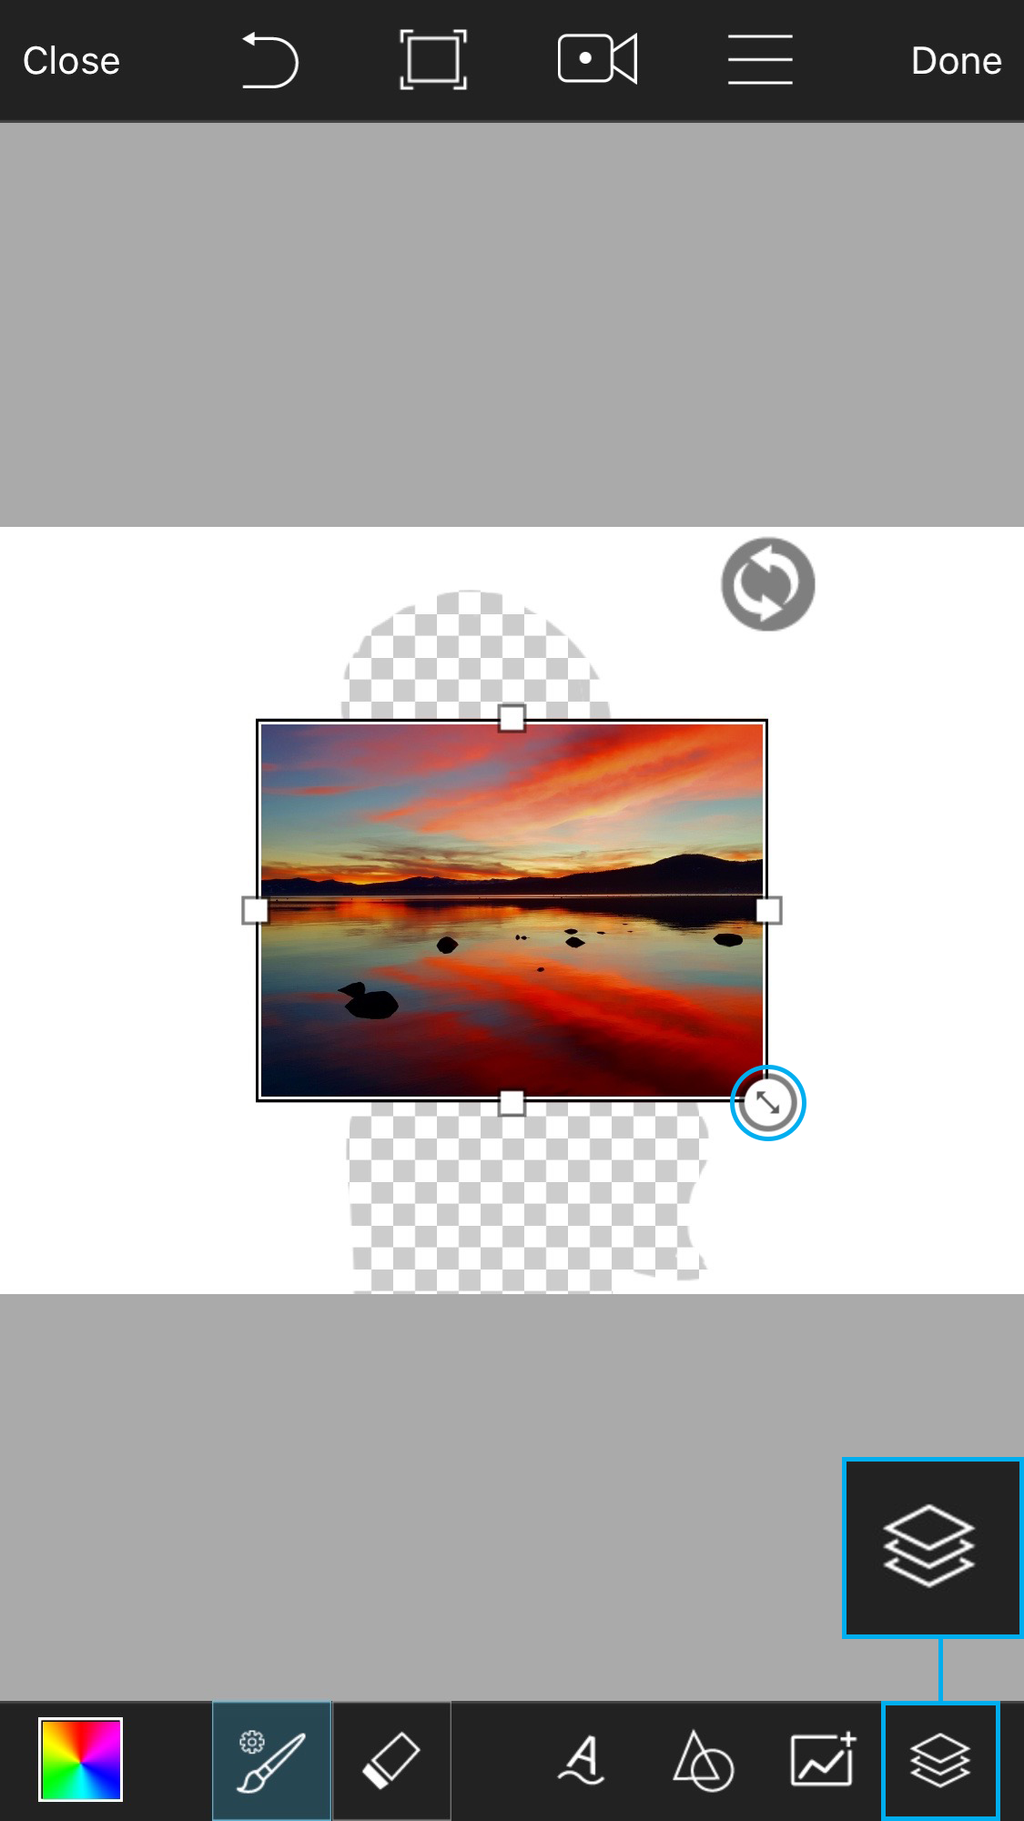
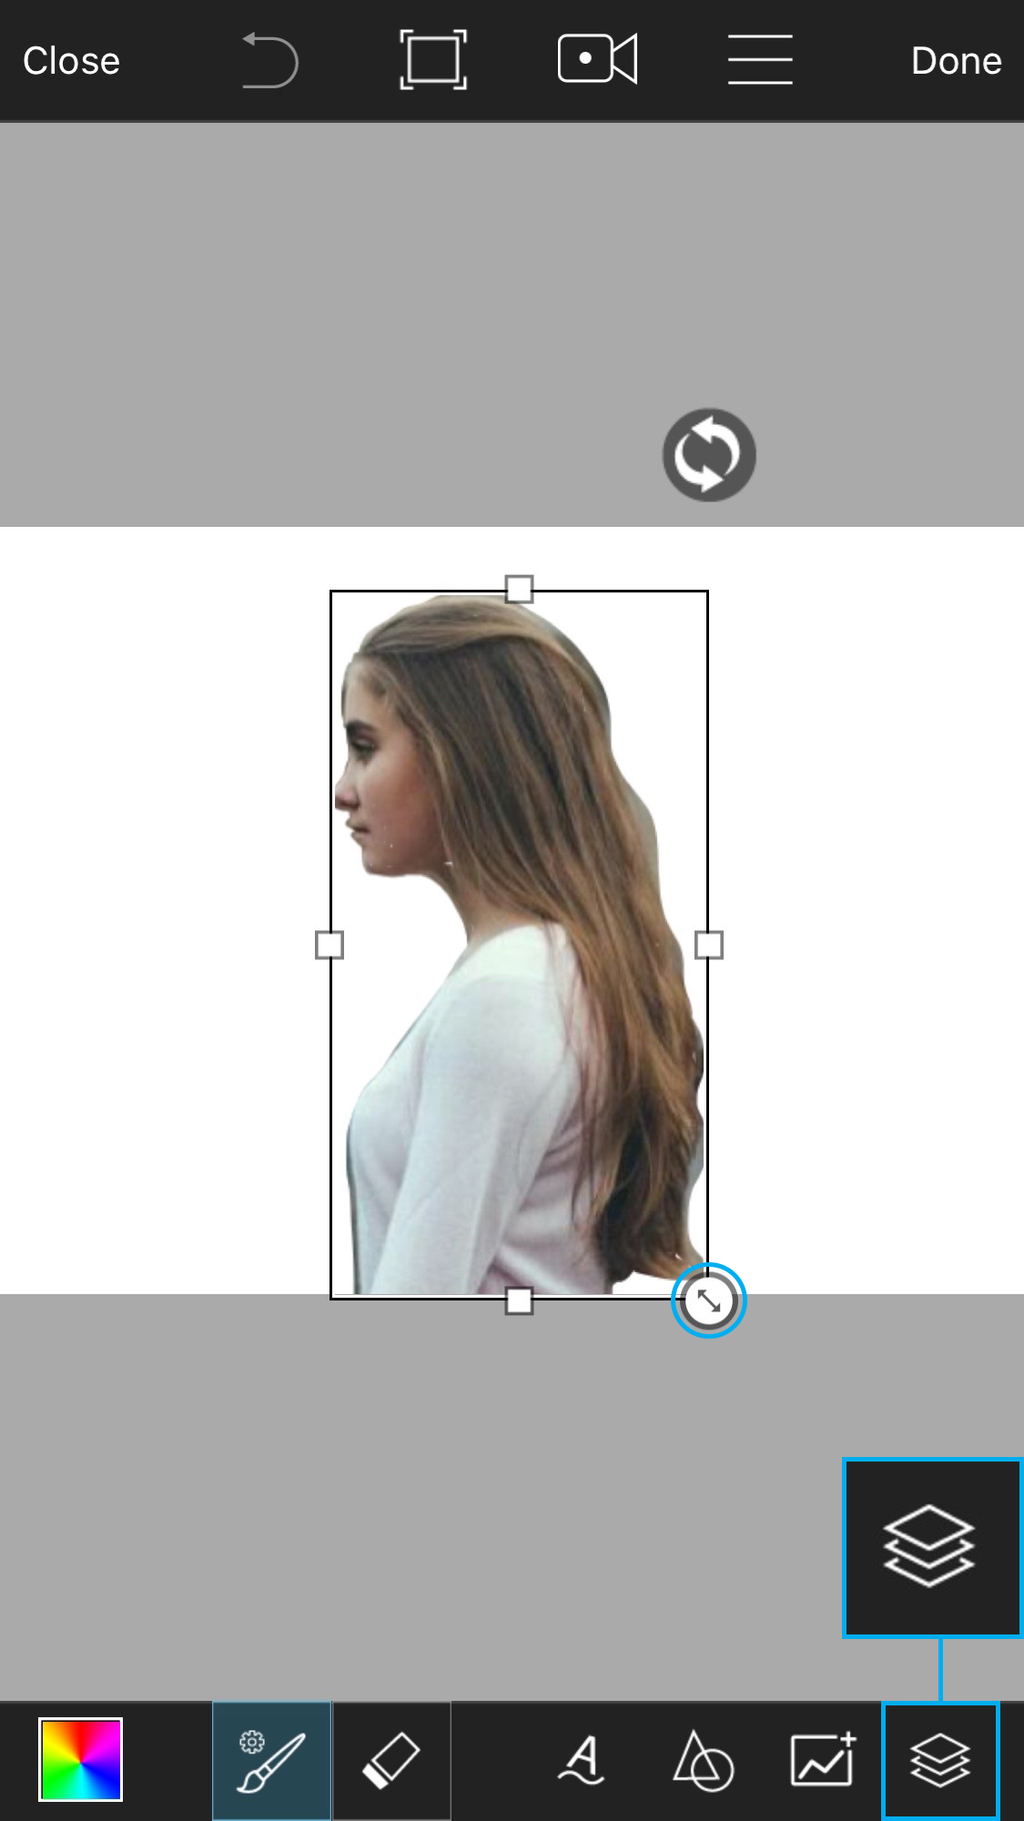 | Step 8
Use the arrow icon in the bottom right corner of the Clipart to enlarge it. Drag the Clipart to place it. To confirm the placement, tap any place on the canvas outside of the Clipart. Tap on the layers icon to open the layers drawer.
|
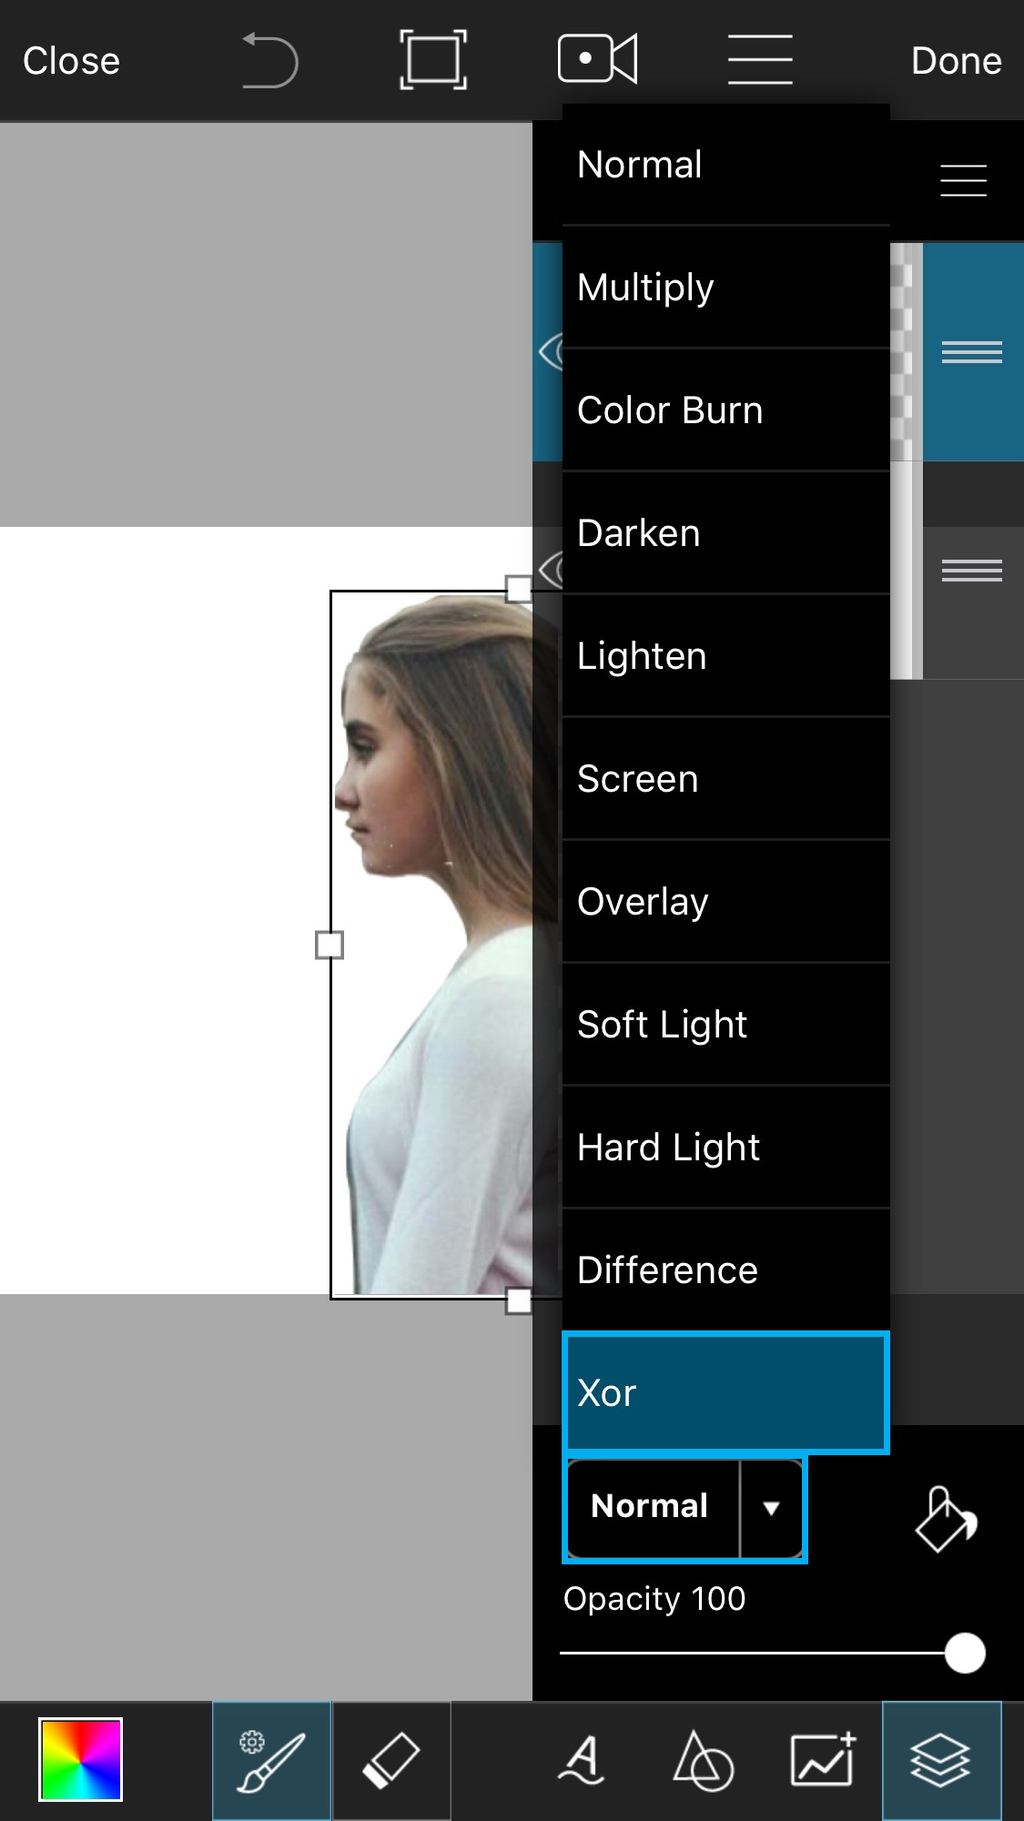 | Step 9
Tap on “Normal” to view your blending mode options and select “Xor.” This will cut out a portion of your canvas in the shape of your Clipart — your stencil!
|
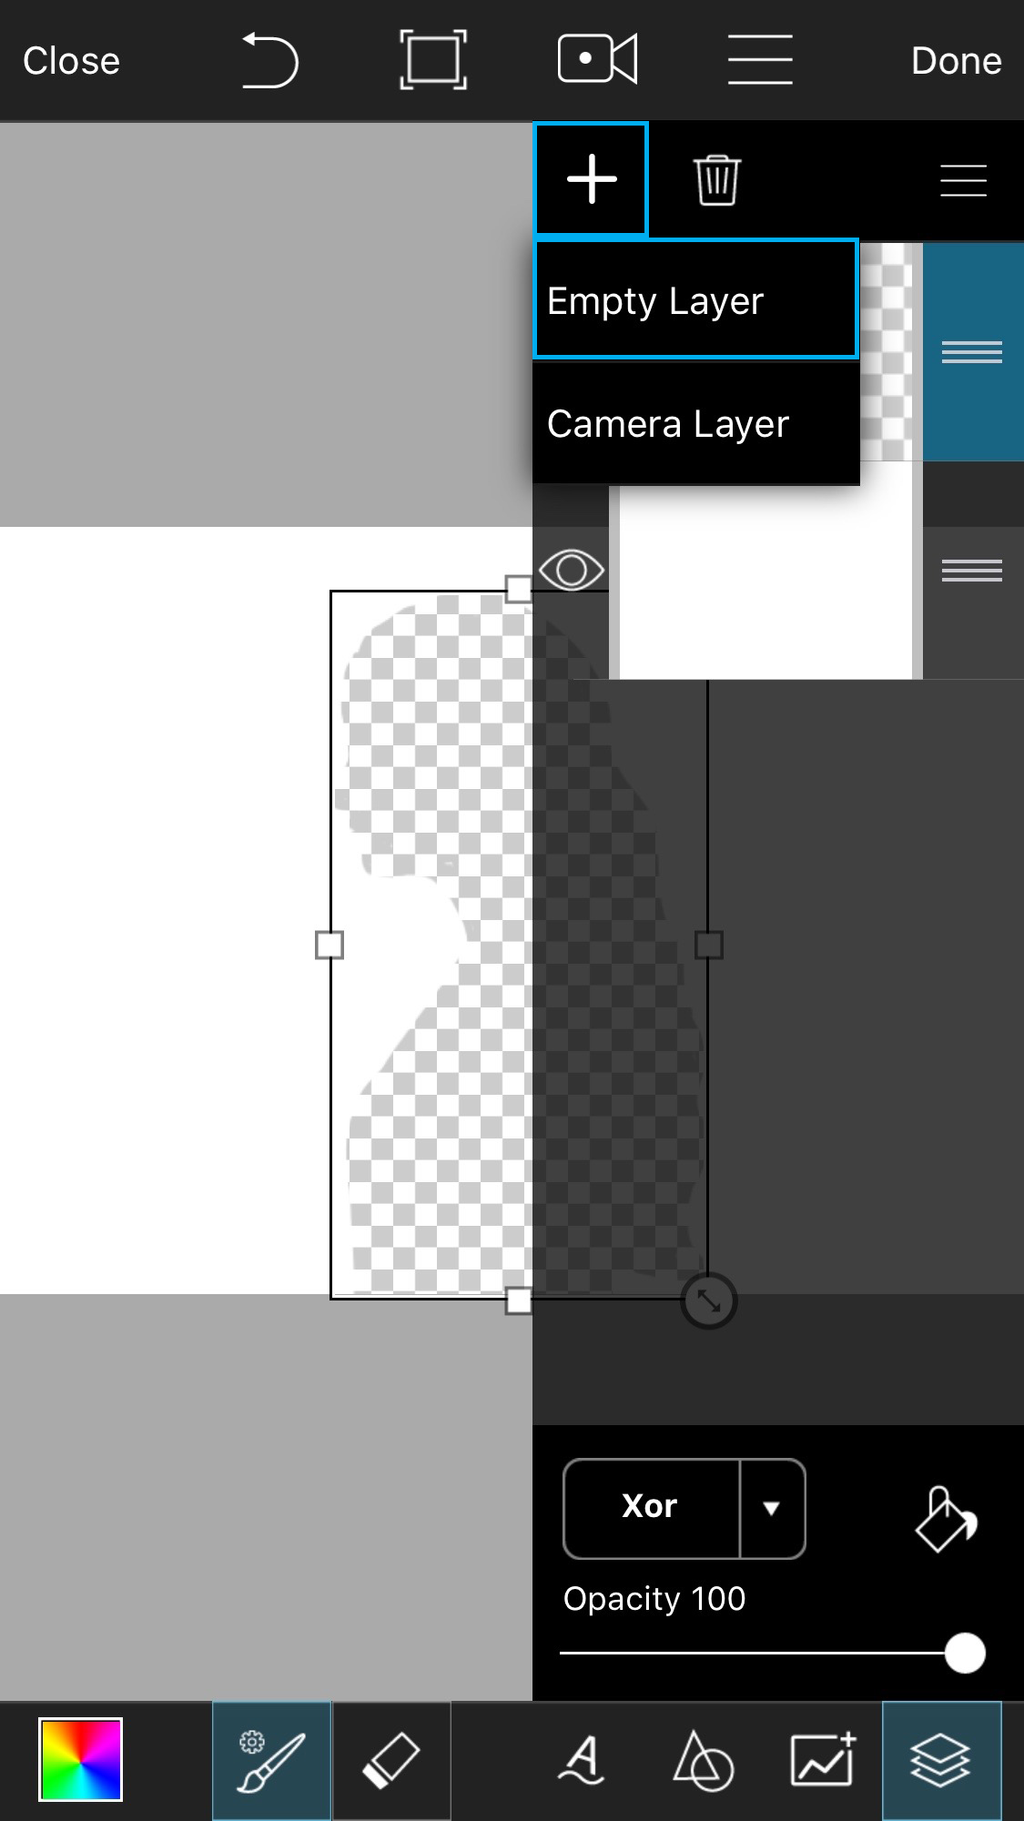 | Step 10
Tap on the plus sign and select Empty Layer.
|
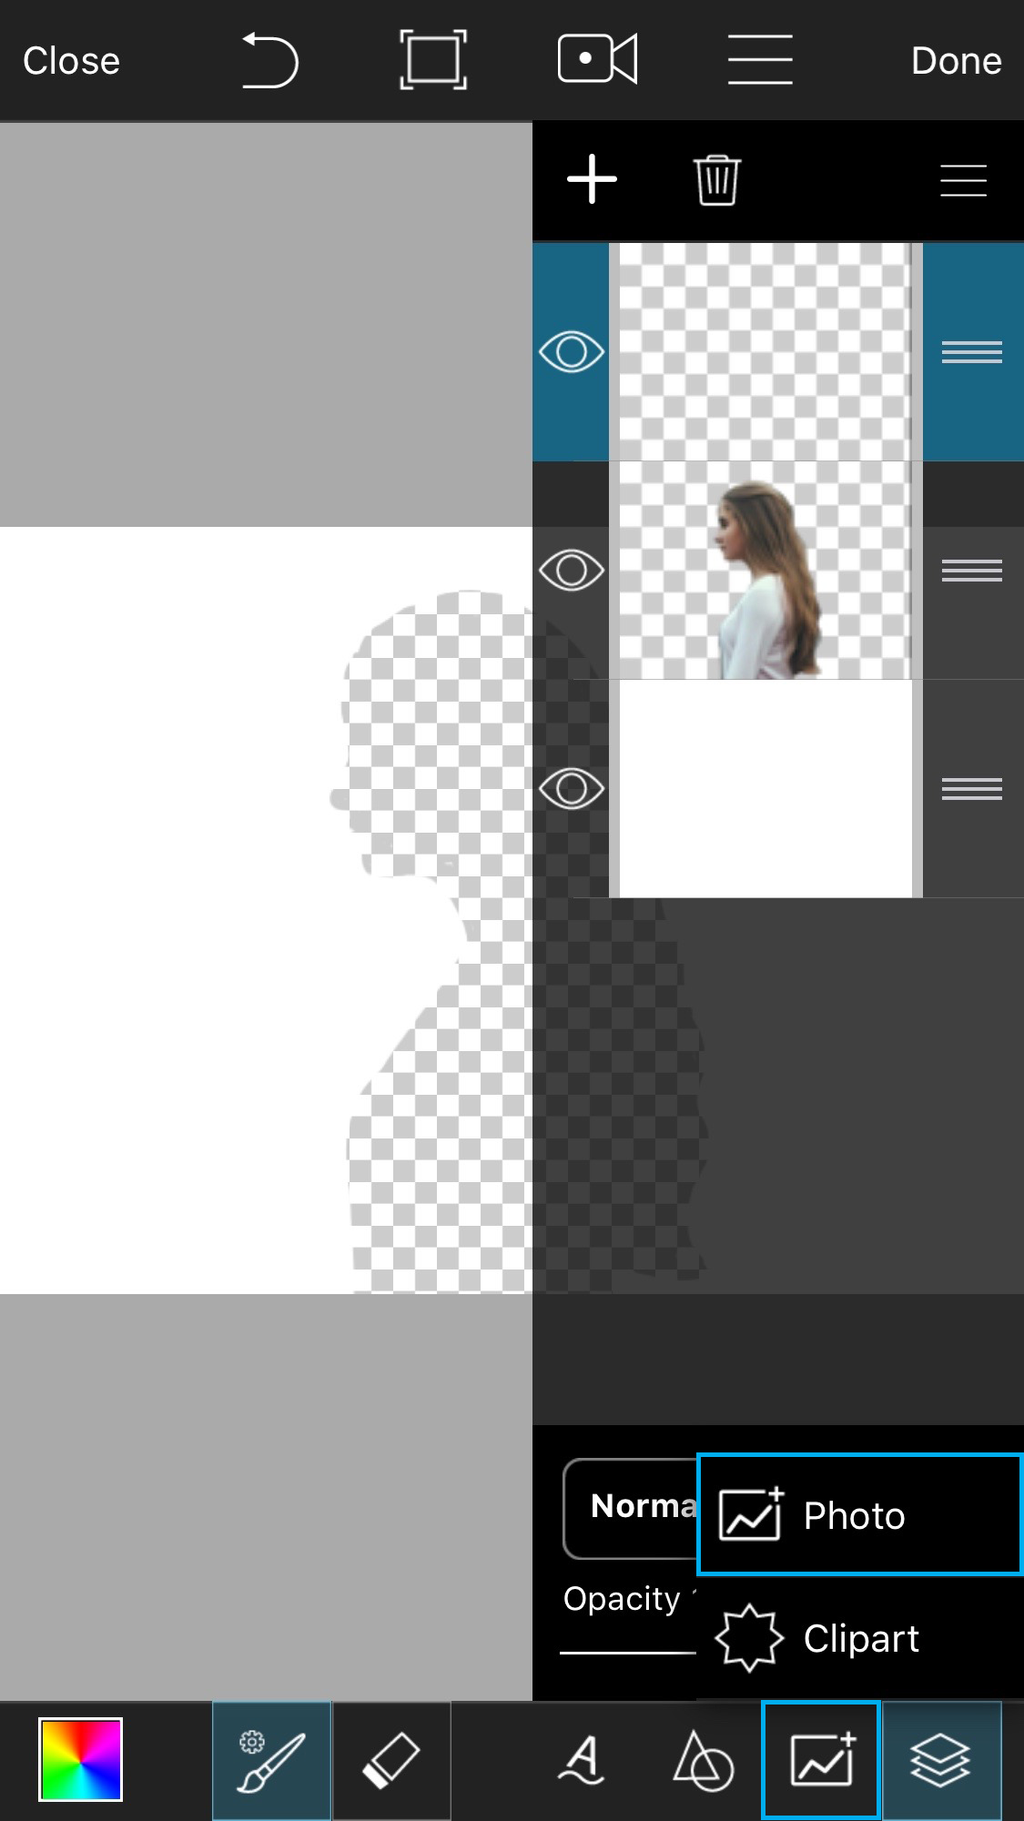 | Step 11
Tap on the Add icon and select Photo. Select a picture of a sunset.
|
 | Step 12
Tap on the layers icon to close the layers drawer.
|
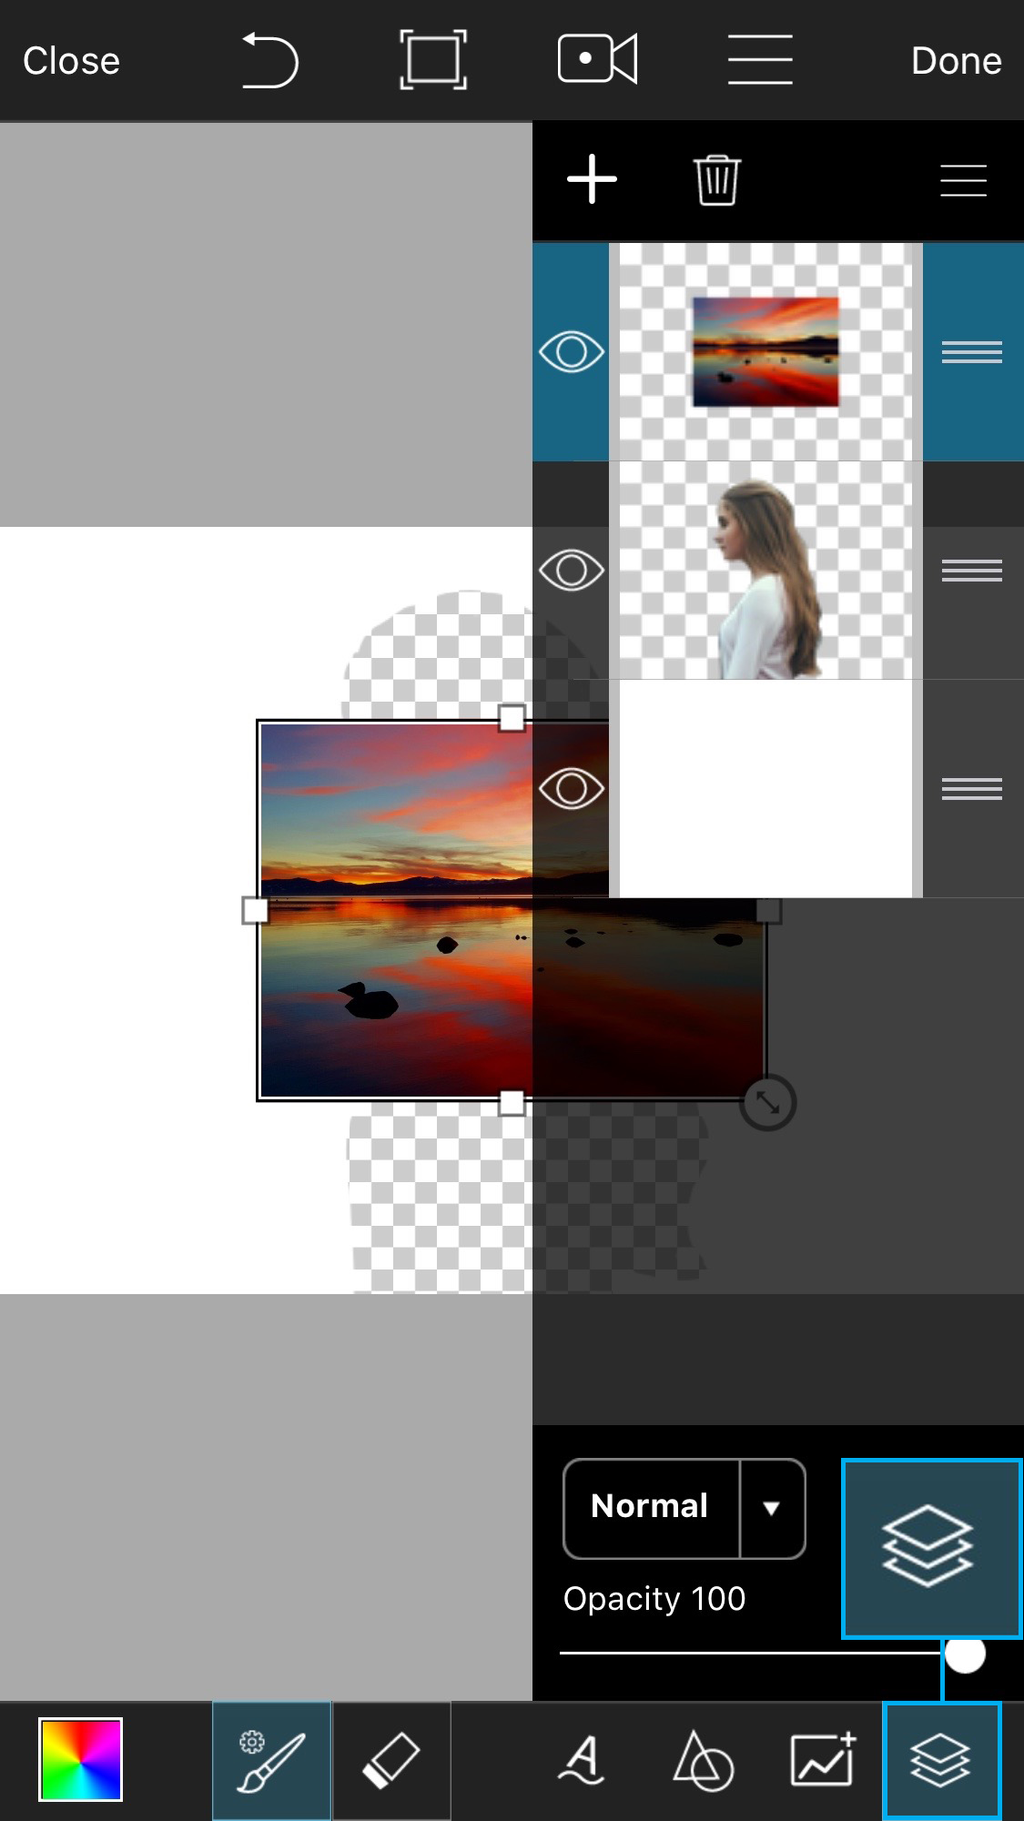
 | Step 13
Use the arrow icon in the bottom right corner to enlarge the photo so that it covers the Clipart cutout entirely. Tap on the layers icon to open the layers drawer.
|
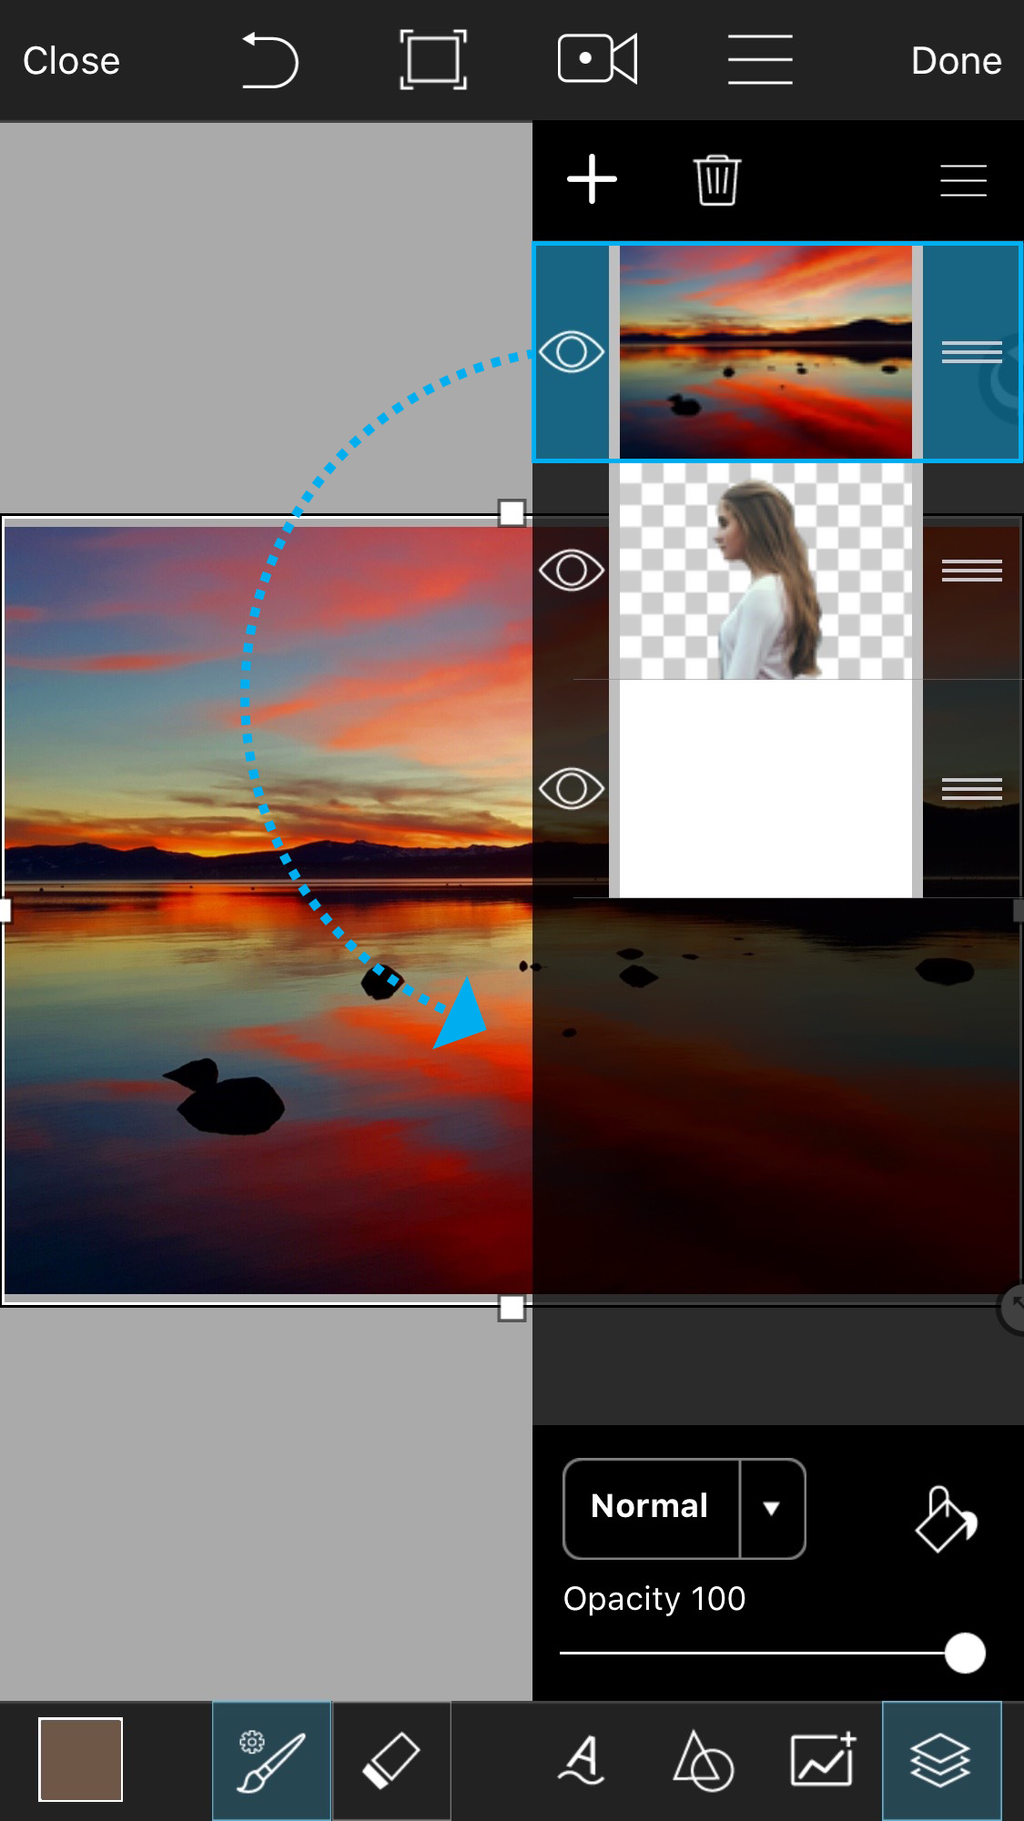 | Step 14
Select the top layer and drag it down so that it becomes the bottom layer.
|
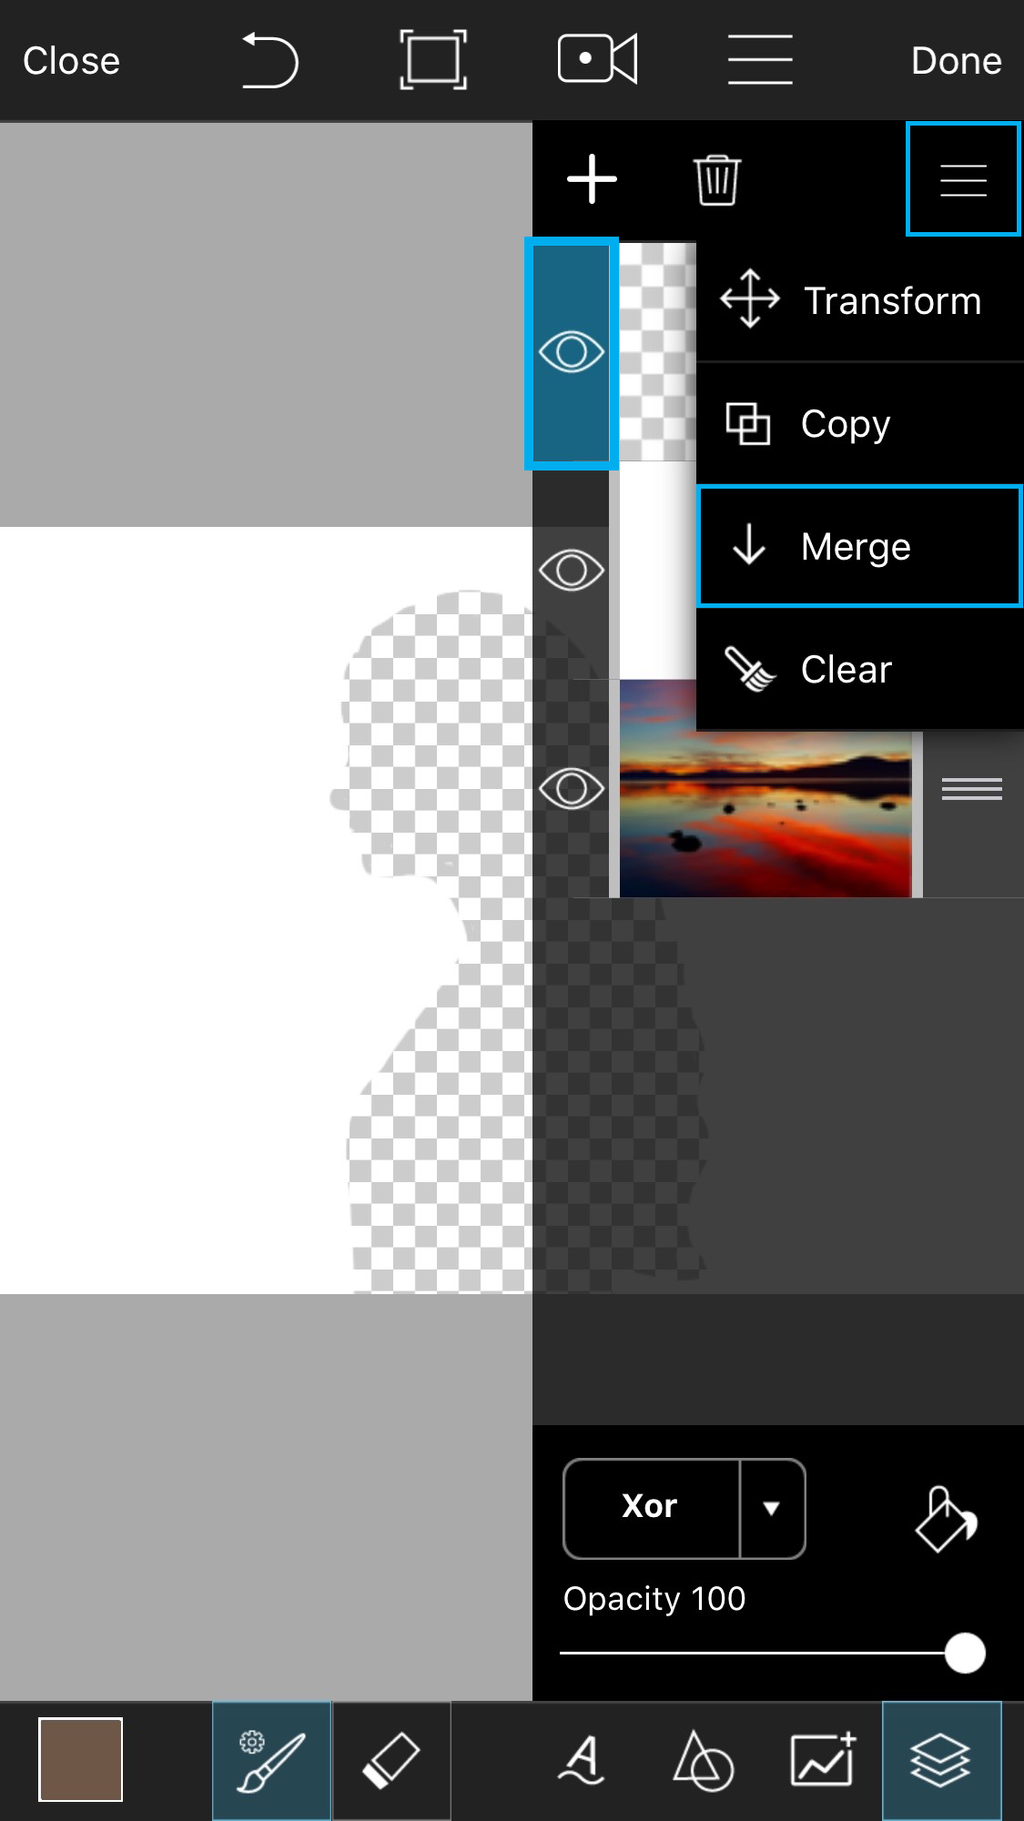 | Step 15
Select the top layer containing your Clipart. Tap on the three-line icon in the top right corner of the layers drawer and select Merge.
|
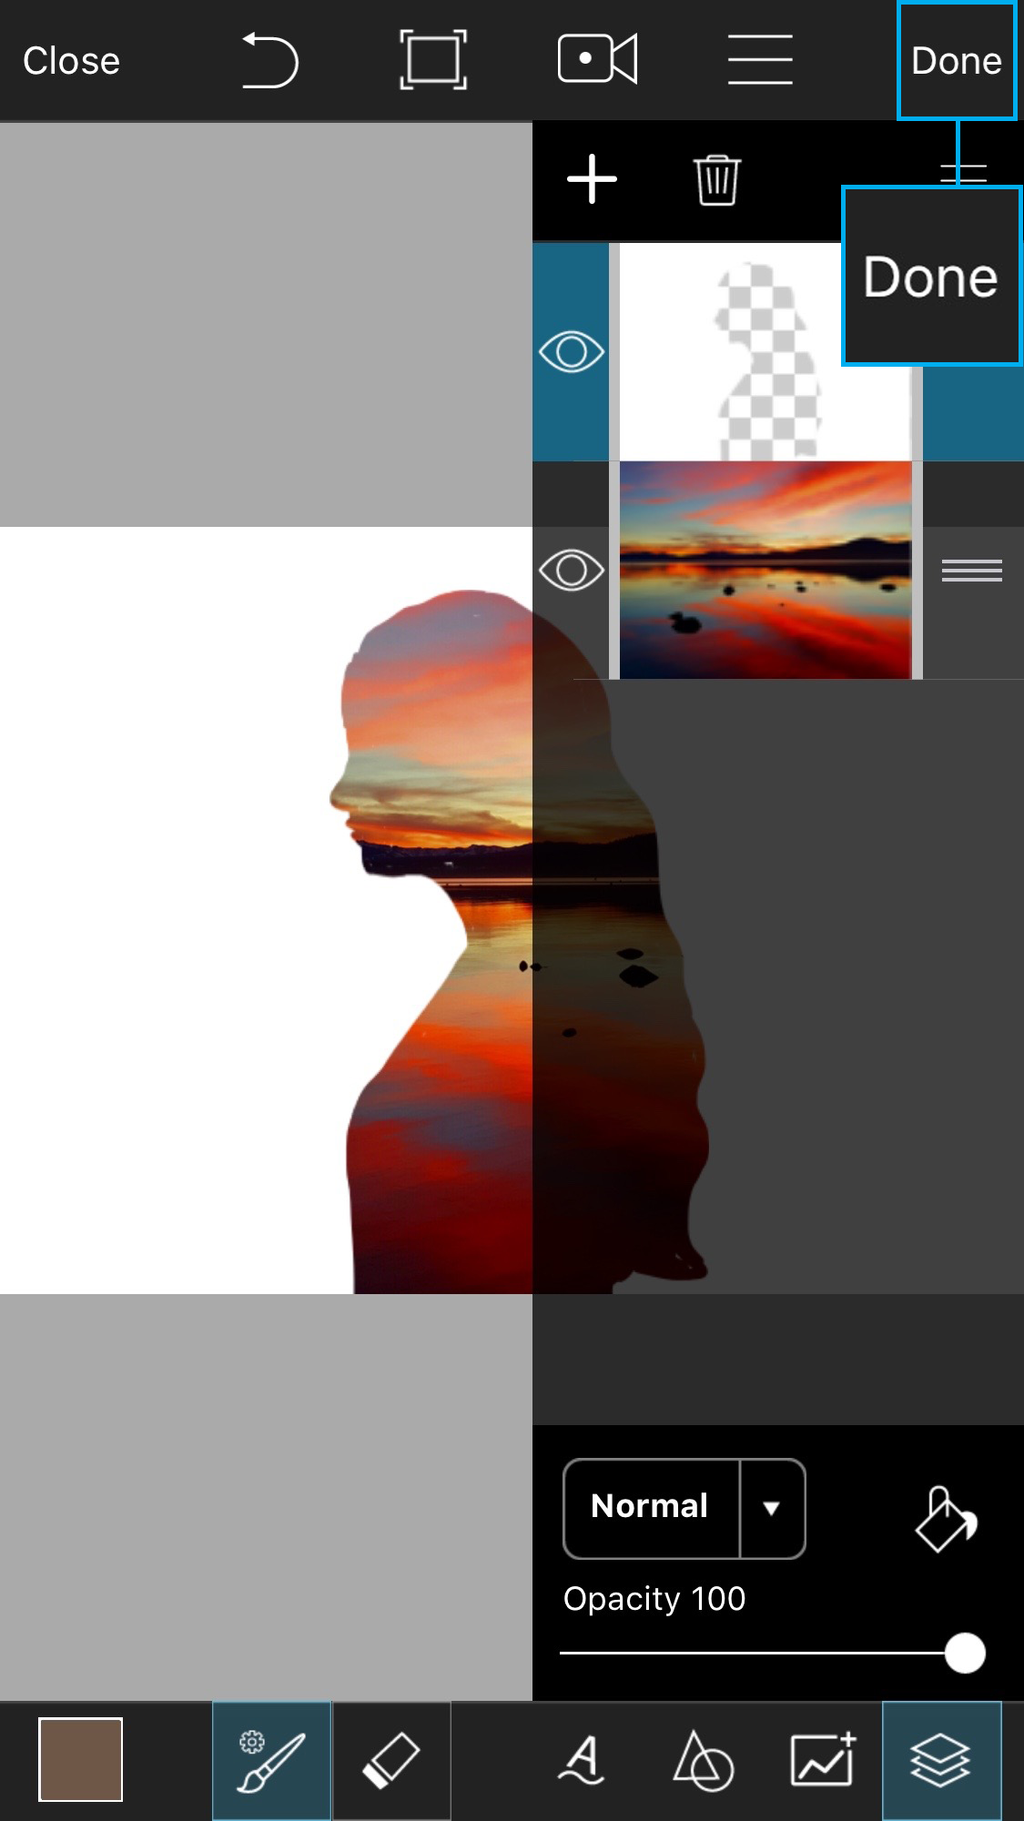 | Step 16
Tap on Done to close Draw. Select “Edit Image.” Your image will open in the photo editor.
|
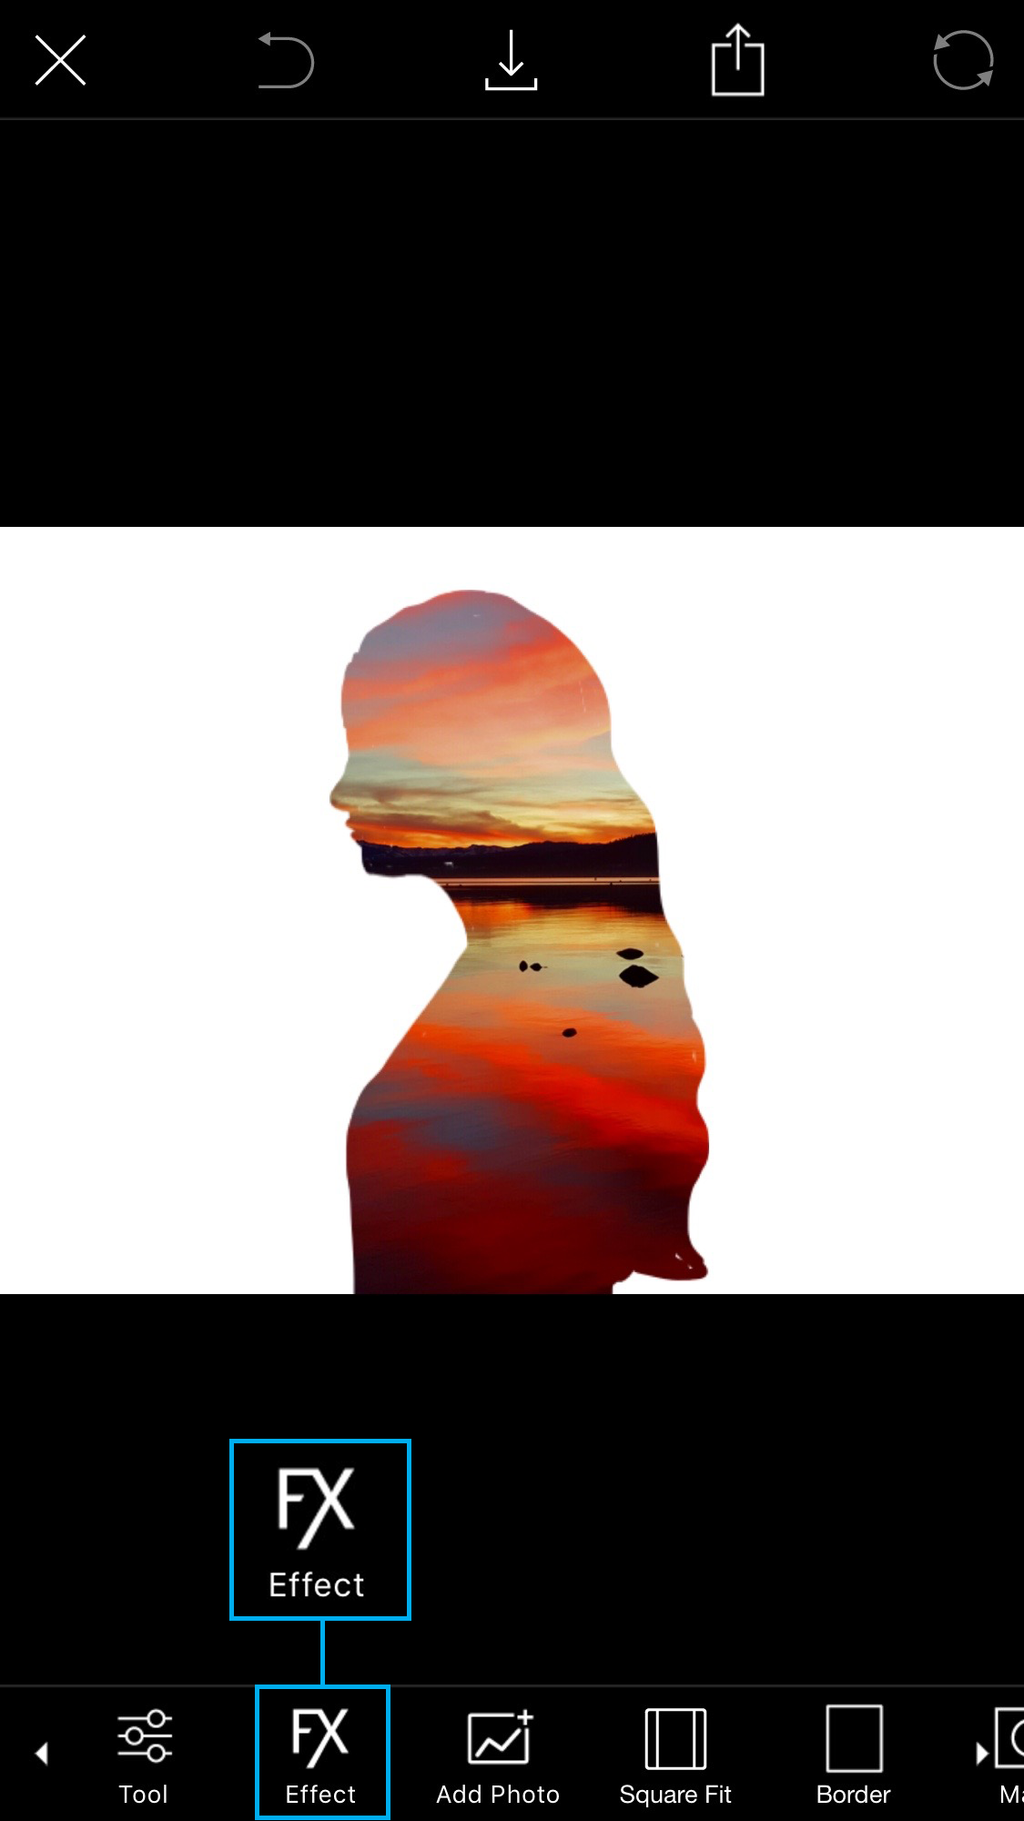 | Step 17
Tap on Effect.
|
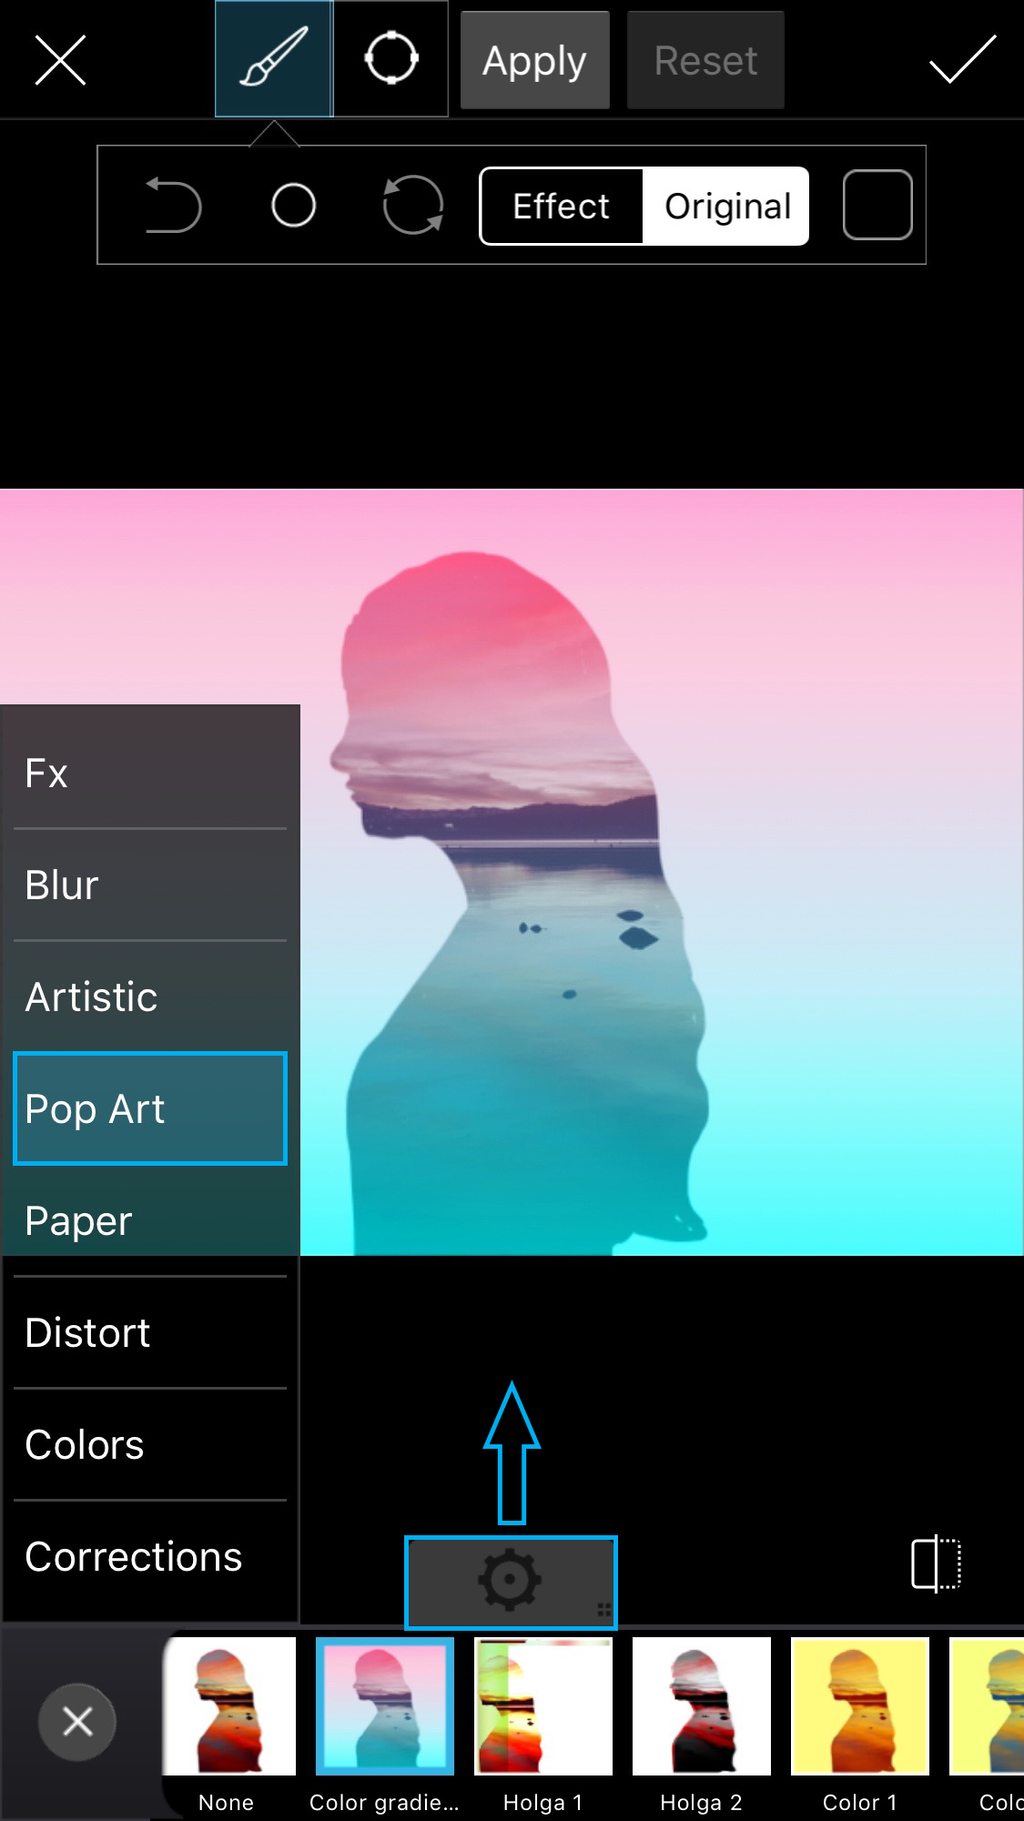 | Step 18
Open the Pop Art section and select the Color Gradient Effect. Tap on the gear icon to open the settings tab.
|
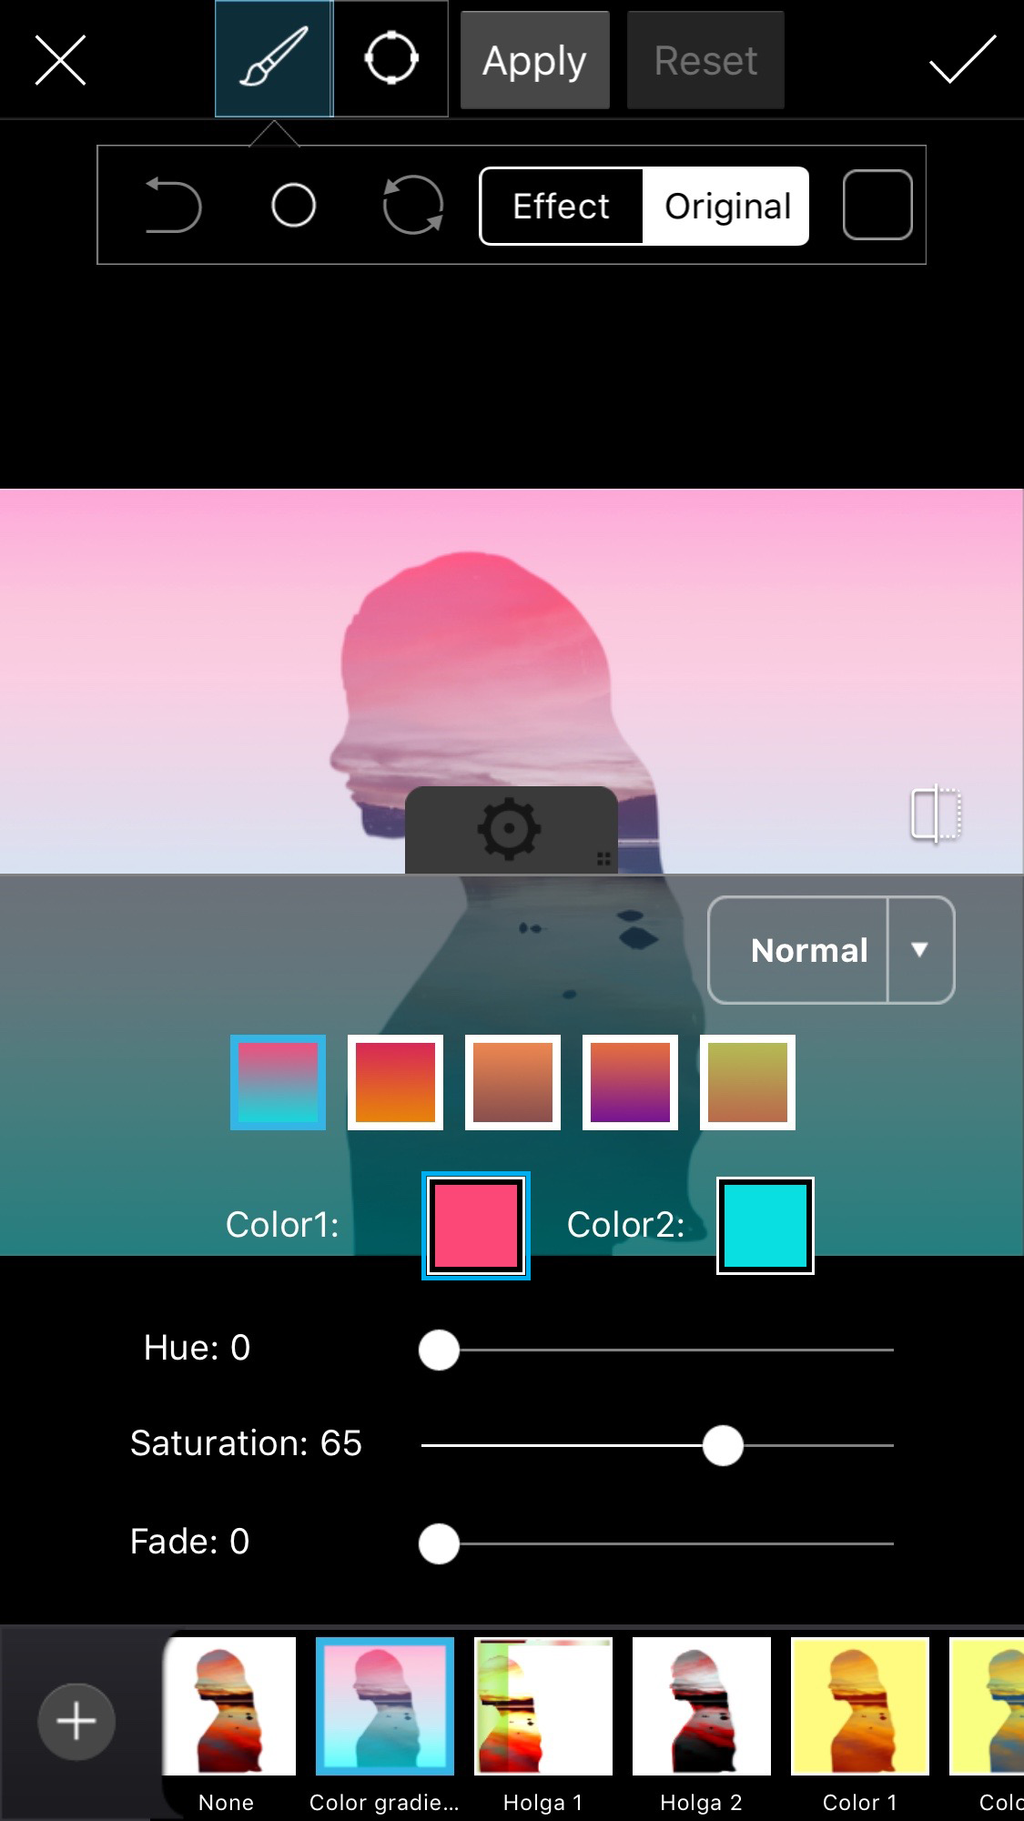 | Step 19
With the first color scheme selected, tap on the Color1 box to select a color for the top half of your gradient.
|
 | Step 20
Select your color (we went with bright purple) and tap on the check mark to confirm.
|
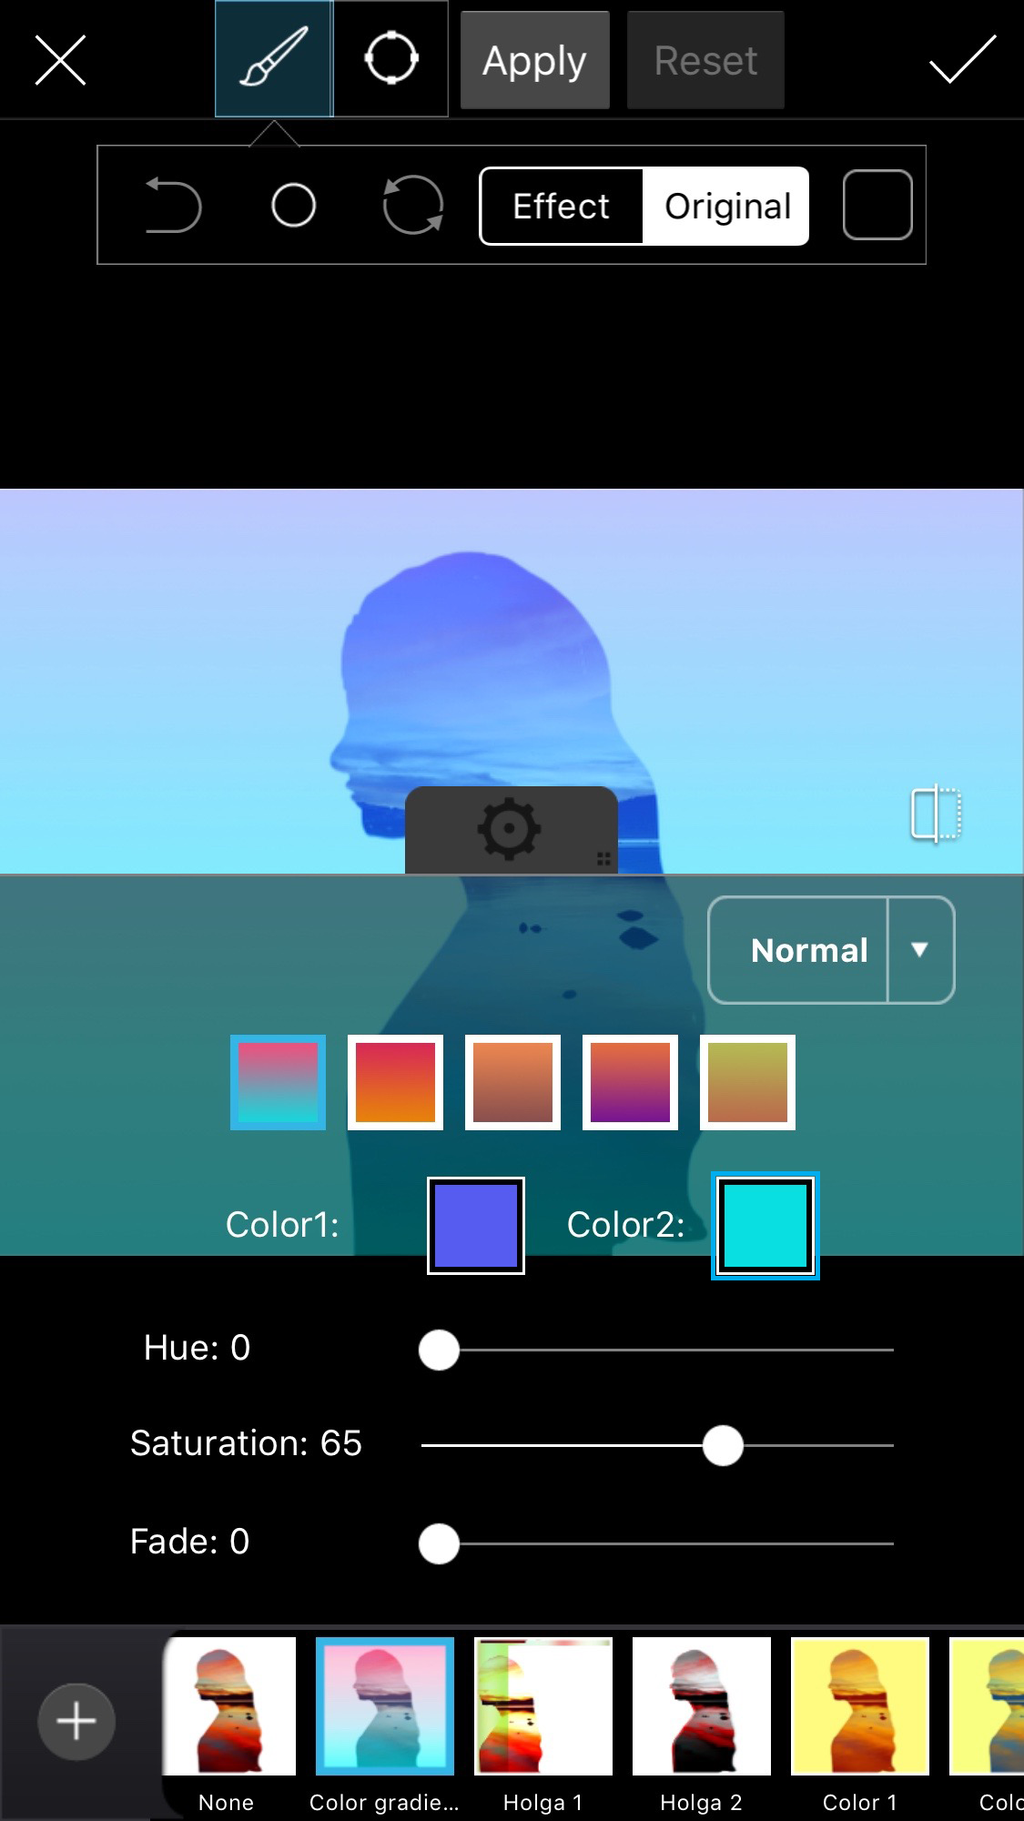 | Step 21
Tap on the Color2 box to select a color for the bottom half of your gradient.
|
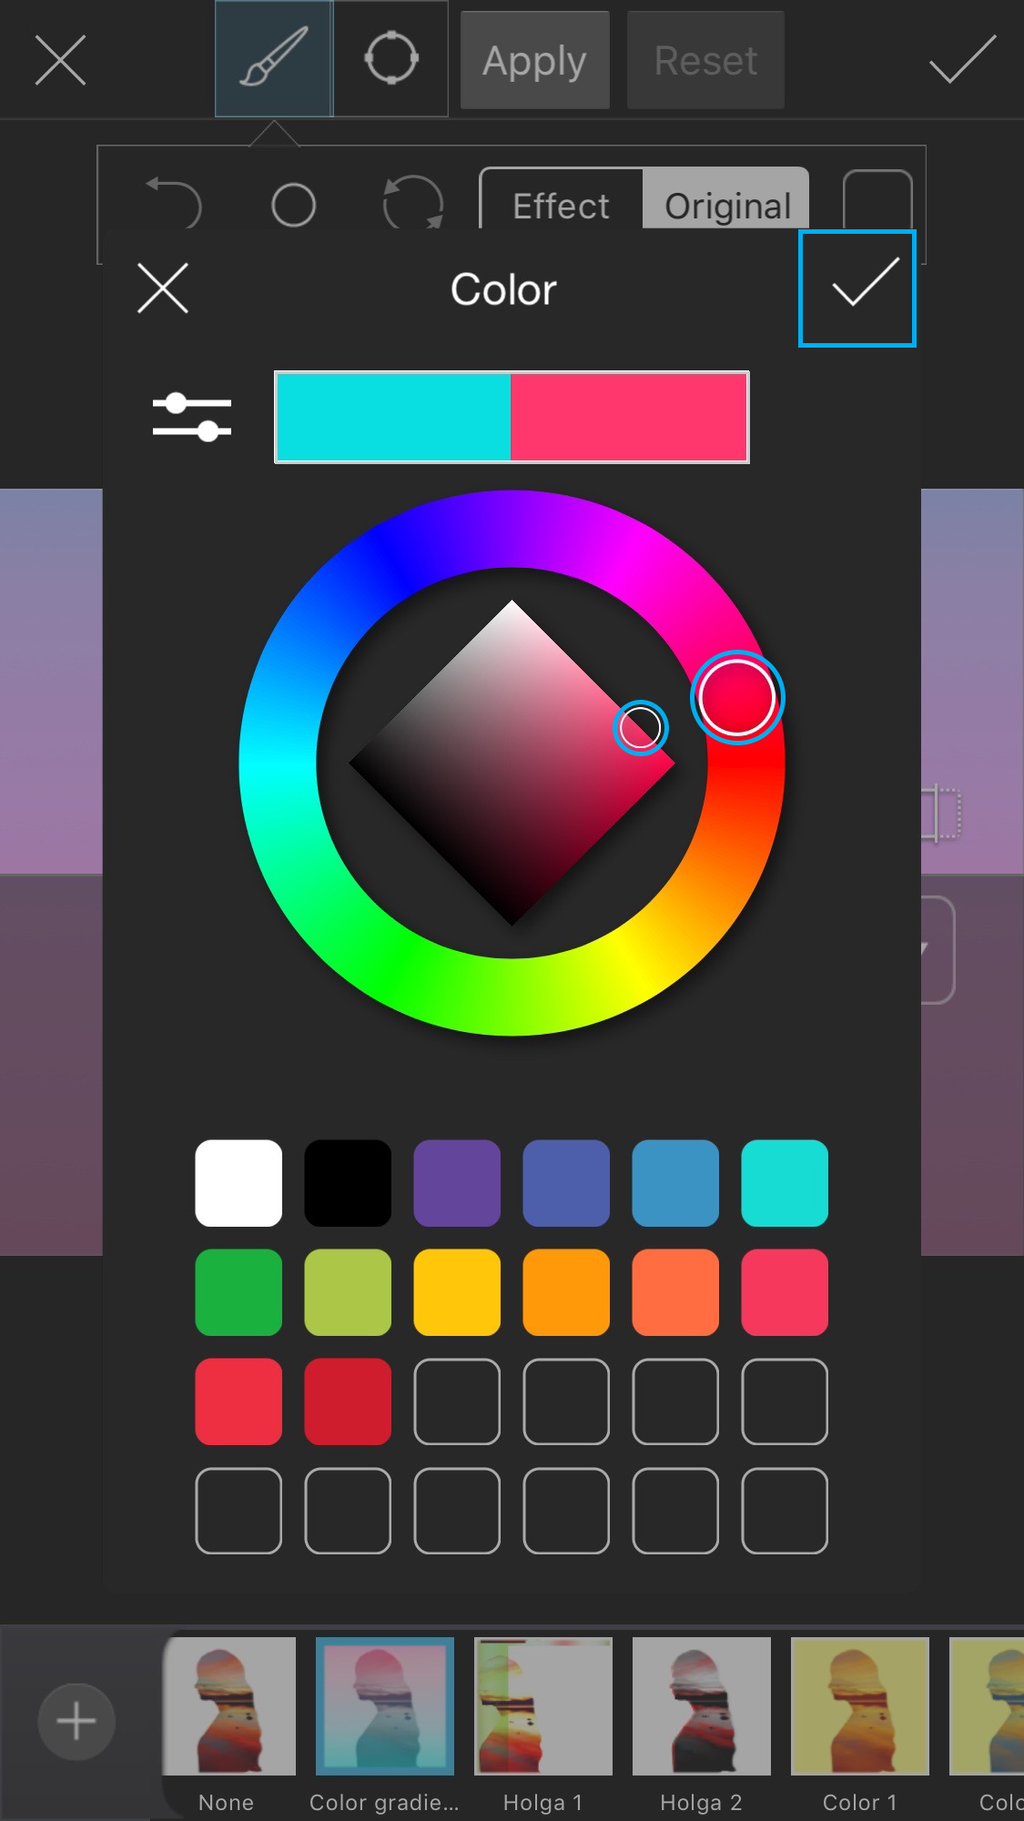 | Step 22
Select your color (we chose bright pink) and tap on the check mark to confirm.
|
 | Step 23
Tap on the check mark to confirm.
|
 | Step 24
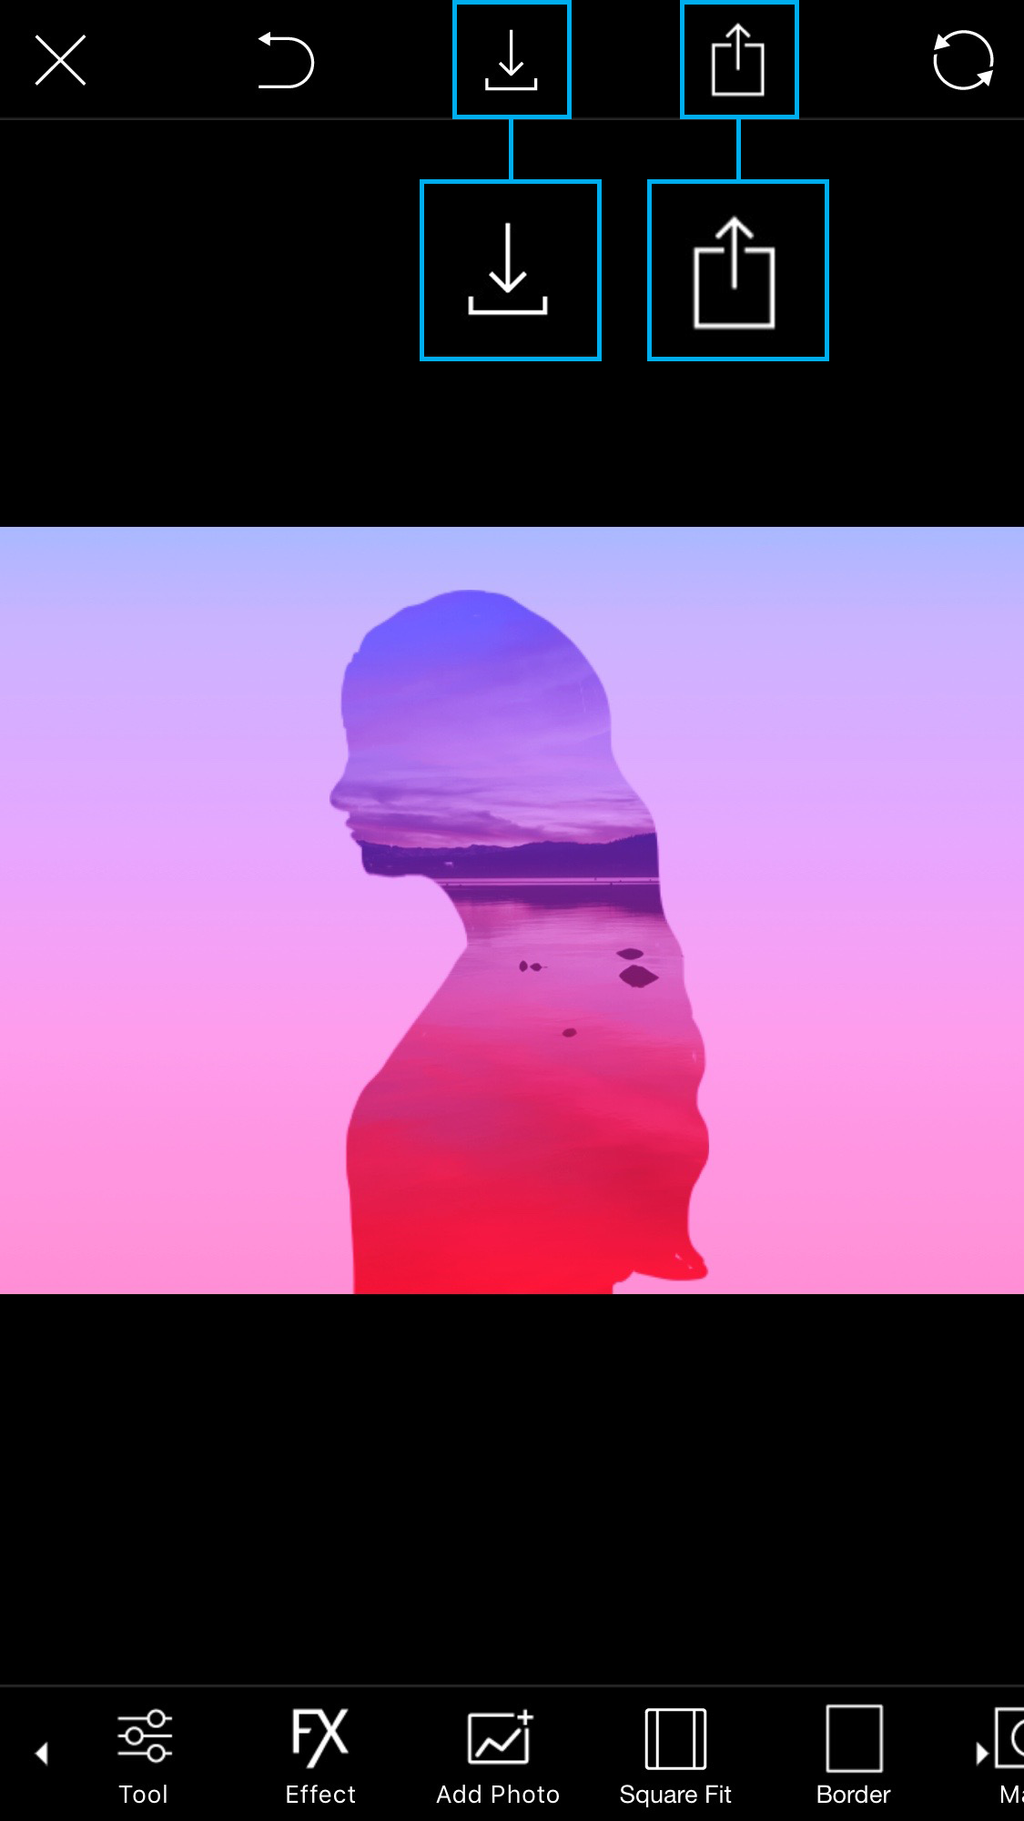
Tap on the Save icon to save your image. Tap on the Share icon to share it with your followers on PicsArt. Add the hashtag #SilhouetteStencil so that everyone can find it!
|


0 comments:
Post a Comment